Quantcast
Channel: MVC – Software Engineering
Viewing all 96 articles
Browse latest View live

Implementing a multi-tenant OIDC Azure AD external login for IdentityServer4

$
0
0

This article shows how to setup a multi-tenant Azure AD external login for IdentityServer4 which uses ASP.NET Core Identity.

Code: IdentityServer4 app with Identity

Setting up the Azure AD Application registration for multiple tenants

An Azure AD Application registration needs to be setup for the Active Directory tenant.

Login to the Azure portal and switch the directory to the Azure Active Directory tenant. Then click the “Azure Active Directory/App Registrations” menus and then the “New application registration” button.

Create a new App registration. The sign-on URL should be set to the “App_URL”/signin-oidc

In the Settings, Properties, change the application to a multi-tenanted one.

Check that all the reply URLs are correct. These must match the calling IdentityServer4 application URL with “/sign-oidc”

Here’s an example:

https://localhost:44318/signin-oidc

Adding the Azure AD login to IdentityServer4

In the IdentityServer4 application, add an OIDC authentication using the AddOpenIdConnect extension method. The Authority is set to the common login from Azure AD. The token validation is turned off, because mutliple tenants can be returned. The CallbackPath path should match the application registration configuration.

services.AddAuthentication()
 .AddOpenIdConnect("aad", "Login with Azure AD", options =>
 {
	 options.Authority = $"https://login.microsoftonline.com/common";
	 options.TokenValidationParameters = 
              new TokenValidationParameters { ValidateIssuer = false };
	 options.ClientId = "99eb0b9d-ca40-476e-b5ac-6f4c32bfb530";
	 options.CallbackPath = "/signin-oidc";
 });

IdentityServer4 is configured to use Identity using the IdentityServer4.AspNetIdentity NuGet package.

services.AddIdentity<ApplicationUser, IdentityRole>()
	.AddEntityFrameworkStores<ApplicationDbContext>()
	.AddDefaultTokenProviders();

services.AddTransient<IProfileService, IdentityWithAdditionalClaimsProfileService>();
services.AddTransient<IEmailSender, EmailSender>();

services.AddIdentityServer()
	.AddSigningCredential(cert)
	.AddInMemoryIdentityResources(Config.GetIdentityResources())
	.AddInMemoryApiResources(Config.GetApiResources())
	.AddInMemoryClients(Config.GetClients(stsConfig))
	.AddAspNetIdentity<ApplicationUser>()
	.AddProfileService<IdentityWithAdditionalClaimsProfileService>();

Add the razor code to the login page which displays the OIDC login button.

@if (Model.ExternalProviders.Any())
{
    <div class="row">
        <div class="panel-body">
            <ul class="list-inline">
                @foreach (var provider in Model.ExternalProviders)
                {
                    <li>
                        <a class="btn btn-default"
                           asp-action="ExternalLogin"
                           asp-route-provider="@provider.AuthenticationScheme"
                           asp-route-returnUrl="@Model.ReturnUrl">
                            @provider.DisplayName
                        </a>
                    </li>
                }
            </ul>
        </div>
    </div>
}

This then calls the action method which does the Azure AD login.

public IActionResult ExternalLogin(string provider, string returnUrl = null)
{
	// Request a redirect to the external login provider.
	var redirectUrl = Url.Action("ExternalLoginCallback", "Account", new { ReturnUrl = returnUrl });
	var properties = _signInManager.ConfigureExternalAuthenticationProperties(provider, redirectUrl);
	return Challenge(properties, provider);
}

When the login from Azure AD returns, ASP.NET Core Identity is then used to register the user, or complete the login, for example using TOTP 2FA which is part of Identity. If you are using existing accounts, and need to map these to the Azure AD login, this can be done in the user profile.

Now you have full control over the claims, identities and can still use the Azure AD from any tenant with little configuration.

Links:

https://portal.azure.com

http://docs.identityserver.io/en/release/quickstarts/4_external_authentication.html

https://docs.microsoft.com/en-us/aspnet/core/security/authentication/identity?view=aspnetcore-2.1&tabs=visual-studio

https://joonasw.net/view/azure-ad-authentication-aspnet-core-api-part-2

https://docs.microsoft.com/en-us/azure/active-directory/develop/v1-protocols-openid-connect-code


Implementing User Management with ASP.NET Core Identity and custom claims

$
0
0

The article shows how to implement user management for an ASP.NET Core application using ASP.NET Core Identity. The application uses custom claims, which need to be added to the user identity after a successful login, and then an ASP.NET Core policy is used to authorize the identity.

Code: https://github.com/damienbod/AspNetCoreAngularSignalRSecurity

Setting up the Project

The demo application is implemented using ASP.NET Core MVC and uses the IdentityServer and IdentityServer4.AspNetIdentity NuGet packages.

ASP.NET Core Identity is then added in the Startup class ConfigureServices method. SQLite is used as a database. A scoped service for the IUserClaimsPrincipalFactory is added so that the additional claims can be added to the Context.User.Identity scoped object.

An IAuthorizationHandler service is added, so that the IsAdminHandler can be used for the IsAdmin policy. This policy can then be used to check if the identity has the custom claims which was added to the identity in the AdditionalUserClaimsPrincipalFactory implementation.

public void ConfigureServices(IServiceCollection services)
{
	...
	
	services.AddDbContext<ApplicationDbContext>(options =>
	 options.UseSqlite(Configuration.GetConnectionString("DefaultConnection")));

	services.AddIdentity<ApplicationUser, IdentityRole>()
	 .AddEntityFrameworkStores<ApplicationDbContext>()
	 .AddDefaultTokenProviders();

	services.AddScoped<IUserClaimsPrincipalFactory<ApplicationUser>, 
	 AdditionalUserClaimsPrincipalFactory>();

	services.AddSingleton<IAuthorizationHandler, IsAdminHandler>();
	services.AddAuthorization(options =>
	{
		options.AddPolicy("IsAdmin", policyIsAdminRequirement =>
		{
			policyIsAdminRequirement.Requirements.Add(new IsAdminRequirement());
		});
	});

	...
}

The application uses IdentityServer4. The UseIdentityServer extension is used instead of the UseAuthentication method to use the authentication.

public void Configure(IApplicationBuilder app, 
  IHostingEnvironment env, 
  ILoggerFactory loggerFactory)
{
	...
	
	app.UseStaticFiles();

	app.UseIdentityServer();

	app.UseMvc(routes =>
	{
		routes.MapRoute(
			name: "default",
			template: "{controller=Home}/{action=Index}/{id?}");
	});
}

The ApplicationUser class implements the IdentityUser class. Additional database fields can be added here, which will then be used to create the claims for the logged in user.

using Microsoft.AspNetCore.Identity;

namespace StsServer.Models
{
    public class ApplicationUser : IdentityUser
    {
        public bool IsAdmin { get; set; }
        public string DataEventRecordsRole { get; set; }
        public string SecuredFilesRole { get; set; }
    }
}

The AdditionalUserClaimsPrincipalFactory class implements the UserClaimsPrincipalFactory class, and can be used to add the additional claims to the user object in the HTTP context. This was added as a scoped service in the Startup class. The ApplicationUser is then used, so that the custom claims can be added to the identity.

using IdentityModel;
using Microsoft.AspNetCore.Identity;
using Microsoft.Extensions.Options;
using StsServer.Models;
using System.Collections.Generic;
using System.Security.Claims;
using System.Threading.Tasks;

namespace StsServer
{
    public class AdditionalUserClaimsPrincipalFactory 
          : UserClaimsPrincipalFactory<ApplicationUser, IdentityRole>
    {
        public AdditionalUserClaimsPrincipalFactory( 
            UserManager<ApplicationUser> userManager,
            RoleManager<IdentityRole> roleManager, 
            IOptions<IdentityOptions> optionsAccessor) 
            : base(userManager, roleManager, optionsAccessor)
        {
        }

        public async override Task<ClaimsPrincipal> CreateAsync(ApplicationUser user)
        {
            var principal = await base.CreateAsync(user);
            var identity = (ClaimsIdentity)principal.Identity;

            var claims = new List<Claim>
            {
                new Claim(JwtClaimTypes.Role, "dataEventRecords"),
                new Claim(JwtClaimTypes.Role, "dataEventRecords.user")
            };

            if (user.DataEventRecordsRole == "dataEventRecords.admin")
            {
                claims.Add(new Claim(JwtClaimTypes.Role, "dataEventRecords.admin"));
            }

            if (user.IsAdmin)
            {
                claims.Add(new Claim(JwtClaimTypes.Role, "admin"));
            }
            else
            {
                claims.Add(new Claim(JwtClaimTypes.Role, "user"));
            }

            identity.AddClaims(claims);
            return principal;
        }
    }
}

Now the policy IsAdmin can check for this. First a requirement is defined. This is done by implementing the IAuthorizationRequirement interface.

using Microsoft.AspNetCore.Authorization;
 
namespace StsServer
{
    public class IsAdminRequirement : IAuthorizationRequirement{}
}

The IsAdminHandler AuthorizationHandler uses the IsAdminRequirement requirement. If the user has the role claim with value admin, then the handler will succeed.

using Microsoft.AspNetCore.Authorization;
using System;
using System.Linq;
using System.Threading.Tasks;

namespace StsServer
{
    public class IsAdminHandler : AuthorizationHandler<IsAdminRequirement>
    {
        protected override Task HandleRequirementAsync(
          AuthorizationHandlerContext context, IsAdminRequirement requirement)
        {
            if (context == null)
                throw new ArgumentNullException(nameof(context));
            if (requirement == null)
                throw new ArgumentNullException(nameof(requirement));

            var adminClaim = context.User.Claims.FirstOrDefault(t => t.Value == "admin" && t.Type == "role"); 
            if (adminClaim != null)
            {
                context.Succeed(requirement);
            }

            return Task.CompletedTask;
        }
    }
}

The AdminController adds a way to do the CRUD operations for the Identity users. The AdminController uses the Authorize attribute with the policy IsAdmin to authorize. The AuthenticationSchemes needs to be set to “Identity.Application”, because Identity is being used. Now admins can create, or edit Identity users.

using System.Linq;
using System.Threading.Tasks;
using Microsoft.AspNetCore.Authorization;
using Microsoft.AspNetCore.Identity;
using Microsoft.AspNetCore.Mvc;
using Microsoft.EntityFrameworkCore;
using StsServer.Data;
using StsServer.Models;

namespace StsServer.Controllers
{
    [Authorize(AuthenticationSchemes = "Identity.Application", Policy = "IsAdmin")]
    public class AdminController : Controller
    {
        private readonly ApplicationDbContext _context;
        private readonly UserManager<ApplicationUser> _userManager;

        public AdminController(ApplicationDbContext context, UserManager<ApplicationUser> userManager)
        {
            _context = context;
            _userManager = userManager;
        }

        public async Task<IActionResult> Index()
        {
            return View(await _context.Users.Select(user => 
                new AdminViewModel {
                    Email = user.Email,
                    IsAdmin = user.IsAdmin,
                    DataEventRecordsRole = user.DataEventRecordsRole,
                    SecuredFilesRole = user.SecuredFilesRole
                }).ToListAsync());
        }

        public async Task<IActionResult> Details(string id)
        {
            if (id == null)
            {
                return NotFound();
            }

            var user = await _context.Users
                .FirstOrDefaultAsync(m => m.Email == id);
            if (user == null)
            {
                return NotFound();
            }

            return View(new AdminViewModel
            {
                Email = user.Email,
                IsAdmin = user.IsAdmin,
                DataEventRecordsRole = user.DataEventRecordsRole,
                SecuredFilesRole = user.SecuredFilesRole
            });
        }

        public IActionResult Create()
        {
            return View();
        }

        [HttpPost]
        [ValidateAntiForgeryToken]
        public async Task<IActionResult> Create(
         [Bind("Email,IsAdmin,DataEventRecordsRole,SecuredFilesRole")] AdminViewModel adminViewModel)
        {
            if (ModelState.IsValid)
            {
                await _userManager.CreateAsync(new ApplicationUser
                {
                    Email = adminViewModel.Email,
                    IsAdmin = adminViewModel.IsAdmin,
                    DataEventRecordsRole = adminViewModel.DataEventRecordsRole,
                    SecuredFilesRole = adminViewModel.SecuredFilesRole,
                    UserName = adminViewModel.Email
                });
                return RedirectToAction(nameof(Index));
            }
            return View(adminViewModel);
        }

        public async Task<IActionResult> Edit(string id)
        {
            if (id == null)
            {
                return NotFound();
            }

            var user = await _userManager.FindByEmailAsync(id);
            if (user == null)
            {
                return NotFound();
            }

            return View(new AdminViewModel
            {
                Email = user.Email,
                IsAdmin = user.IsAdmin,
                DataEventRecordsRole = user.DataEventRecordsRole,
                SecuredFilesRole = user.SecuredFilesRole
            });
        }

        [HttpPost]
        [ValidateAntiForgeryToken]
        public async Task<IActionResult> Edit(string id, [Bind("Email,IsAdmin,DataEventRecordsRole,SecuredFilesRole")] AdminViewModel adminViewModel)
        {
            if (id != adminViewModel.Email)
            {
                return NotFound();
            }

            if (ModelState.IsValid)
            {
                try
                {
                    var user = await _userManager.FindByEmailAsync(id);
                    user.IsAdmin = adminViewModel.IsAdmin;
                    user.DataEventRecordsRole = adminViewModel.DataEventRecordsRole;
                    user.SecuredFilesRole = adminViewModel.SecuredFilesRole;

                    await _userManager.UpdateAsync(user);
                }
                catch (DbUpdateConcurrencyException)
                {
                    if (!AdminViewModelExists(adminViewModel.Email))
                    {
                        return NotFound();
                    }
                    else
                    {
                        throw;
                    }
                }
                return RedirectToAction(nameof(Index));
            }
            return View(adminViewModel);
        }

        public async Task<IActionResult> Delete(string id)
        {
            if (id == null)
            {
                return NotFound();
            }

            var user = await _userManager.FindByEmailAsync(id);
            if (user == null)
            {
                return NotFound();
            }

            return View(new AdminViewModel
            {
                Email = user.Email,
                IsAdmin = user.IsAdmin,
                DataEventRecordsRole = user.DataEventRecordsRole,
                SecuredFilesRole = user.SecuredFilesRole
            });
        }

        [HttpPost, ActionName("Delete")]
        [ValidateAntiForgeryToken]
        public async Task<IActionResult> DeleteConfirmed(string id)
        {
            var user = await _userManager.FindByEmailAsync(id);
            await _userManager.DeleteAsync(user);
            return RedirectToAction(nameof(Index));
        }

        private bool AdminViewModelExists(string id)
        {
            return _context.Users.Any(e => e.Email == id);
        }
    }
}

Running the application

When the application is started, the ADMIN menu can be clicked, and the users can be managed by administrators.

Links

http://benfoster.io/blog/customising-claims-transformation-in-aspnet-core-identity

https://adrientorris.github.io/aspnet-core/identity/extend-user-model.html

https://docs.microsoft.com/en-us/aspnet/core/security/authentication/identity?view=aspnetcore-2.1&tabs=visual-studio

ASP.NET Core MVC Ajax Form requests using jquery-unobtrusive

$
0
0

This article shows how to send Ajax requests in an ASP.NET Core MVC application using jquery-unobtrusive. This can be tricky to setup, for example when using a list of data items with forms using the onchange Javascript event, or the oninput event.

Code: https://github.com/damienbod/AspNetCoreBootstrap4Validation

Setting up the Project

The project uses the npm package.json file, to add the required front end packages to the project. jquery-ajax-unobtrusive is added as well as the other required dependencies.

{
  "version": "1.0.0",
  "name": "asp.net",
  "private": true,
  "devDependencies": {
    "bootstrap": "4.1.3",
    "jquery": "3.3.1",
    "jquery-validation": "1.17.0",
    "jquery-validation-unobtrusive": "3.2.10",
    "jquery-ajax-unobtrusive": "3.2.4"
  }
}

bundleconfig.json is used to package and build the Javascript and the css files into bundles. The BuildBundlerMinifier NuGet package needs to be added to the project for this to work.

The Javascript libraries are packaged into 2 different bundles, vendor-validation.min.js and vendor-validation.min.js.

// Vendor JS
{
    "outputFileName": "wwwroot/js/vendor.min.js",
    "inputFiles": [
      "node_modules/jquery/dist/jquery.min.js",
      "node_modules/bootstrap/dist/js/bootstrap.bundle.min.js"
    ],
    "minify": {
      "enabled": true,
      "renameLocals": true
    },
    "sourceMap": false
},
// Vendor Validation JS
{
    "outputFileName": "wwwroot/js/vendor-validation.min.js",
    "inputFiles": [
      "node_modules/jquery-validation/dist/jquery.validate.min.js",
      "node_modules/jquery-validation/dist/additional-methods.js",
      "node_modules/jquery-validation-unobtrusive/dist/jquery.validate.unobtrusive.min.js",
      "node_modules//jquery-ajax-unobtrusive/jquery.unobtrusive-ajax.min.js"
    ],
    "minify": {
      "enabled": true,
      "renameLocals": true
    },
    "sourceMap": false
}

The global bundles can be added at the end of the _Layout.cshtml file in the ASP.NET Core MVC project.


... 
    <script src="~/js/vendor.min.js" asp-append-version="true"></script>
    <script src="~/js/site.min.js" asp-append-version="true"></script>
    @RenderSection("scripts", required: false)
</body>
</html>

And the validation bundle is added to the _ValidationScriptsPartial.cshtml.

<script src="~/js/vendor-validation.min.js" asp-append-version="true"></script>

This is then added in the views as required.

@section Scripts  {
    @await Html.PartialAsync("_ValidationScriptsPartial")
}

Simple AJAX Form request

A form request can be sent as an Ajax request, by adding the html attributes to the form element. When the request is finished, the div element with the id attribute defined in the data-ajax-update parameter, will be replaced with the partial result response. The Html.PartialAsync method calls the initial view.

@{
    ViewData["Title"] = "Ajax Test Page";
}

<h4>Ajax Test</h4>

<form asp-action="Index" asp-controller="AjaxTest" 
      data-ajax="true" 
      data-ajax-method="POST"
      data-ajax-mode="replace" 
      data-ajax-update="#ajaxresult" >

    <div id="ajaxresult">
        @await Html.PartialAsync("_partialAjaxForm")
    </div>
</form>

@section Scripts  {
    @await Html.PartialAsync("_ValidationScriptsPartial")
}

The _partialAjaxForm.cshtml view implements the form contents. The submit button is required to send the request as an Ajax request.

@model AspNetCoreBootstrap4Validation.ViewModels.AjaxValidationModel 

<div asp-validation-summary="All" class="text-danger"></div>

<div class="form-group">
  <label for="name">Name</label>
  <input type="text" class="form-control" asp-for="Name" 
     id="AjaxValidationModelName" aria-describedby="nameHelp" 
     placeholder="Enter name">
  <small id="nameHelp" class="form-text text-muted">
    We'll never share your name ...
  </small>
  <span asp-validation-for="Name" class="text-danger"></span>
</div>

<div class="form-group">
  <label for="age">Age</label>
  <input type="number" class="form-control" 
    id="AjaxValidationModelAge" asp-for="Age" placeholder="0">
  <span asp-validation-for="Age" class="text-danger"></span>
</div>

<div class="form-check ten_px_bottom">
  <input type="checkbox" class="form-check-input big_checkbox"
      asp-for="IsCool" id="AjaxValidationModelIsCool">
  <label class="form-check-label ten_px_left" for="IsCool">IsCool</label>
  <span asp-validation-for="IsCool" class="text-danger"></span>
</div>

<button type="submit" class="btn btn-primary">Submit</button>

The ASP.NET Core MVC controller handles the requests from the view. The first Index method in the example below, just responds to a plain HTTP GET.

The second Index method accepts a POST request with the Anti-Forgery token which is sent with each request. When the result is successful, a partial view is returned. The model state must also be cleared, otherwise the validation messages will not be reset.

If the page returns the incorrect result, ie just the content of the partial view, then the request was not sent asynchronously, but as a full page request. You need to check, that the front end packages are included correctly.

public class AjaxTestController : Controller
{
  public IActionResult Index()
  {
    return View(new AjaxValidationModel());
  }

  [HttpPost]
  [ValidateAntiForgeryToken]
  public IActionResult Index(AjaxValidationModel model)
  {
    if (!ModelState.IsValid)
    {
      return PartialView("_partialAjaxForm", model);
    }

    // the client could validate this, but allowed for testing server errors
    if(model.Name.Length < 3)
    {
      ModelState.AddModelError("name", "Name should be longer than 2 chars");
      return PartialView("_partialAjaxForm", model);
    }

    ModelState.Clear();
    return PartialView("_partialAjaxForm");
  }
}

Complex AJAX Form request

In this example, a list of data items are returned to the view. Each item in the list will have a form to update its data, and also the data will be updated using a checkbox onchange event or the input text oninput event and not the submit button.

Because a list is used, the div element to be updated must have a unique id. This can be implemented by creating a new GUID with each item, and can be used then in the name of the div to be updated, and also the data-ajax-update parameter.

@using AspNetCoreBootstrap4Validation.ViewModels
@model AjaxValidationListModel
@{
    ViewData["Title"] = "Ajax Test Page";
}

<h4>Ajax Test</h4>

@foreach (var item in Model.Items)
{
    string guid = Guid.NewGuid().ToString();

    <form asp-action="Index" asp-controller="AjaxComplexList" 
          data-ajax="true" 
          data-ajax-method="POST"
          data-ajax-mode="replace" 
          data-ajax-update="#complex-ajax-@guid">

        <div id="complex-ajax-@guid">
            @await Html.PartialAsync("_partialComplexAjaxForm", item)
        </div>
    </form>
}


@section Scripts  {
    @await Html.PartialAsync("_ValidationScriptsPartial")
}

The form data will send the update with an onchange Javascript event from the checkbox. This could be required for example, when the UX designer wants instant updates, instead of an extra button click. To achieve this, the submit button is not displayed. A unique id is used to identify each button, and the onchange event from the checkbox triggers the submit event using this. Now the form request will be sent using Ajax like before.

@model AspNetCoreBootstrap4Validation.ViewModels.AjaxValidationModel
@{
    string guid = Guid.NewGuid().ToString();
}

<div asp-validation-summary="All" class="text-danger"></div>

<div class="form-group">
    <label for="name">Name</label>

    <input type="text" class="form-control" asp-for="Name" 
      id="AjaxValidationModelName" aria-describedby="nameHelp" placeholder="Enter name"
      oninput="$('#submit-@guid').trigger('submit');">

    <small id="nameHelp" class="form-text text-muted">We'll never share your name ...</small>
    <span asp-validation-for="Name" class="text-danger"></span>
</div>
<div class="form-group">
    <label for="age">Age</label>

    <input type="number" asp-for="Age" 
      class="form-control" id="AjaxValidationModelAge" placeholder="0"
      oninput="$('#submit-@guid').trigger('submit');">

    <span asp-validation-for="Age" class="text-danger"></span>
</div>
<div class="form-check ten_px_bottom">

    @Html.CheckBox("IsCool", Model.IsCool,
        new { onchange = "$('#submit-" + @guid + "').trigger('submit');", @class = "big_checkbox" })

    <label class="form-check-label ten_px_left" >Check the checkbox to send a request</label>
</div>

<button style="display: none" id="submit-@guid" type="submit">Submit</button>

The ASP.NET Core controller returns the HTTP GET and POST like before.

using AspNetCoreBootstrap4Validation.ViewModels;

namespace AspNetCoreBootstrap4Validation.Controllers
{
    public class AjaxComplexListController : Controller
    {
        public IActionResult Index()
        {
            return View(new AjaxValidationListModel {
                Items = new List<AjaxValidationModel> {
                    new AjaxValidationModel(),
                    new AjaxValidationModel()
                }
            });
        }

        [HttpPost]
        [ValidateAntiForgeryToken]
        public IActionResult Index(AjaxValidationModel model)
        {
            if (!ModelState.IsValid)
            {
                return PartialView("_partialComplexAjaxForm", model);
            }

            // the client could validate this, but allowed for testing server errors
            if(model.Name.Length < 3)
            {
                ModelState.AddModelError("name", "Name should be longer than 2 chars");
                return PartialView("_partialComplexAjaxForm", model);
            }

            ModelState.Clear();
            return PartialView("_partialComplexAjaxForm", model);
        }
    }
}

When the requests are sent, you can check this using the F12 developer tools in the browser using the network tab. The request type should be xhr.

Links

https://dotnetthoughts.net/jquery-unobtrusive-ajax-helpers-in-aspnet-core/

https://www.mikesdotnetting.com/article/326/using-unobtrusive-ajax-in-razor-pages

https://www.learnrazorpages.com/razor-pages/ajax/unobtrusive-ajax

https://damienbod.com/2018/07/08/updating-part-of-an-asp-net-core-mvc-view-which-uses-forms/

https://ml-software.ch/blog/extending-client-side-validation-with-fluentvalidation-and-jquery-unobtrusive-in-an-asp-net-core-application

https://ml-software.ch/blog/extending-client-side-validation-with-dataannotations-and-jquery-unobtrusive-in-an-asp-net-core-application

Using MVC ASP.NET Core APPs in a Host ASP.NET Core Application

$
0
0

This article shows how ASP.NET Core applications could be deployed inside a separate host ASP.NET Core MVC application. This could be useful if you have separate applications, services, or layouts but want to have a common user interface, or common deployment to improve the user experience.

Code: https://github.com/damienbod/MultipleMvcApps

Setup

The applications are split into four different projects to demonstrate some of the possibilities. Two applications are complete ASP.NET Core MVC applications with a database, separate services, use localization and a unique layout.

The host application references the child MVC applications and the shared project contains the localizations for all applications.

The projects can be added as references in visual studio.

ASP.NET Core Areas

The MVC applications are referenced into the host application and use areas per application. This needs to be added to the route configuration. The areas route is added first, and then the default routes for the host application views and controllers.

Host application routing:

app.UseMvc(routes =>
{
	routes.MapRoute(
	  name: "areas",
	  template: "{area:exists}/{controller=Home}/{action=Index}/{id?}"
	);

	routes.MapRoute(
		name: "default",
		template: "{controller=Home}/{action=Index}/{id?}");
});

In the child applications, the UI logic is added to an area. The area attribute MUST be added to the MVC controller. If your area controller, view is not working, this is usually the problem.

Example of a controller in one of the child applications:

namespace MvcApp1.Controllers
{
    [Area("MvcApp1")]
    public class HomeController : Controller
    {

Area setup solution explorer:

ASP.NET Core Layouts

Each application uses its own layout. This is defined in the _ViewStart.cshtml file. This makes it really easy to have application specific layouts, even when hosting inside the separate application.

One problem with this, is that all applications use the same css and js files, ie the ones built and deployed in the host application. This means that the html header and the javascript links all need to match the host project. Application specific css or javascript files would need to be deployed and included then in the host application if this is required. Inline css and javascript would be deployed as part of the child views, but this should be avoided.

The demo application uses bootstrap 4 with npm and bundleconfig. The different layouts have separate background colors to demonstrate.

ASP.NET Core Navigation

The navigation between the different areas needs to be changed, because different areas or applications are used to implement the MVC apps.

The href is called using the path, for example “~/Home/Index”. This will then work for all the different applications, areas.

<nav class="bg-dark mb-4 navbar navbar-dark navbar-expand-md">
  <a href="~/Home/Index" class="navbar-brand">
	<em>HO</em>
  </a>
  <button aria-controls="navbarCollapse" 
	aria-expanded="false" 
	aria-label="Toggle navigation" 
	class="navbar-toggler" 
	data-target="#topNavbarCollapse" 
	data-toggle="collapse" type="button">
	<span class="navbar-toggler-icon"></span>
  </button>
  <div class="collapse navbar-collapse" id="topNavbarCollapse">
	<ul class="mr-auto navbar-nav">
	  <li class="nav-item">
		<a href="~/Home/Index" class="nav-link">
		@SharedLocalizer.GetLocalizedHtmlString("HOME HOST")
		</a>
	  </li>
	  <li class="nav-item">
		<a href="~/MvcApp1/Home/Index" 
		class="nav-link">MvcApp1</a>
	  </li>
	  <li class="nav-item">
		<a href="~/MvcApp2/Home/Index" 
		class="nav-link">MvcApp2</a>
	  </li>
	</ul>
  </div>
</nav>

IoC and Services

Each application has its own services, which are only required by the application itself. The different applications have also services required by all three separate projects.

The common services can be added directly to the host application. These are also added to the child applications, but only required to test or build.

The specific services can be added in a separate extension class and used in both the host application and the child application. The ServicesExtensions class implements the services for the child application. A database context could be added here, or whatever.

using Microsoft.EntityFrameworkCore;
using Microsoft.Extensions.Configuration;
using Microsoft.Extensions.DependencyInjection;
using MvcApp1.Models;

namespace MvcApp1
{
 public static class ServicesExtensions
  {
    public static void AddMvcApp1(
     this IServiceCollection services, IConfiguration configuration)
    {
      services.AddSingleton<ExampleService>();

      services.AddDbContext<SomeDataContext>(options =>
       options.UseSqlServer(
       configuration.GetConnectionString("SomeDataContext")
	   )
	  );
  }
 }
}

This is then used in the host application as well as the child application. The configurations for the child applications must be added to the host application configuration.

public IConfiguration Configuration { get; }

public void ConfigureServices(IServiceCollection services)
{
	services.AddMvcApp1(Configuration);

	services.AddMvcApp2(Configuration);

Localization

The localization for all the projects is implemented in a shared project. This is then used in the host application as a shared localization.


  services.AddSingleton<LocService>();
  services.AddLocalization(options => 
	options.ResourcesPath = "Resources");

  services.Configure<RequestLocalizationOptions>(
	options =>
	{
		var supportedCultures = new List<CultureInfo>
			{
				new CultureInfo("en-US"),
				new CultureInfo("de-CH")
			};

		options.DefaultRequestCulture = new RequestCulture(
			culture: "en-US", 
			uiCulture: "en-US");
		options.SupportedCultures = supportedCultures;
		options.SupportedUICultures = supportedCultures;

		options.RequestCultureProviders.Insert(0, 
			new QueryStringRequestCultureProvider());
	});

  services.AddMvc()
	.AddViewLocalization()
	.AddDataAnnotationsLocalization(options =>
	{
	options.DataAnnotationLocalizerProvider = (type, factory) =>
	{
		var assemblyName = new AssemblyName(
			typeof(SharedResource).GetTypeInfo().Assembly.FullName);
		return factory.Create("SharedResource", assemblyName.Name);
	};
  }).SetCompatibilityVersion(CompatibilityVersion.Version_2_2);
}

public void Configure(IApplicationBuilder app, IHostingEnvironment env)
{
  ...

  var locOptions = 
   app.ApplicationServices.GetService<IOptions<RequestLocalizationOptions>>();
  app.UseRequestLocalization(locOptions.Value);

  ...
}

To build the child applications, the LocService must also be added if this is used in one of the views, or a service.

Notes

This works with very little effort and uses ASP.NET Core more or less as it is, but also has room for lots of improvements. For example, the application specific services are registered in the host and are registered for the whole host, not just the child application. This could be improved by having application specific services. The shared css and javascript could also be optimized, maybe through an internal npm or something like that.

By hosting the different applications inside a single hosted application, the user experience can be greatly improved, the application security can be simplified, the deployment complexity is reduced and the logic remains separated.

Links

https://docs.microsoft.com/en-us/aspnet/core/mvc/controllers/areas?view=aspnetcore-2.1

OpenID Connect back-channel logout using Azure Redis Cache and IdentityServer4

$
0
0

This article shows how to implement an OpenID Connect back-channel logout, which uses Azure Redis cache so that the session logout will work with multi instance deployments.

Code: https://github.com/damienbod/AspNetCoreBackChannelLogout

Setting up the Azure Redis Cache

Before using the Azure Redis Cache in the application, this needs to be setup in Azure. Joonas Westlin has a nice blog about this. The Redis Azure FAQ link is also very good, which should help you decide the configuration which is correct for you.

Click “Create a Resource” and enter Redis Cache in the search input.

Then create the Redis Cache as required:

Creating the cache takes some time. Once finished, the connection string can be copied from the Access keys

Now that the Azure Redis is setup, you can add the cache to the ASP.NET Core application. In this example, the Microsoft.Extensions.Caching.Redis NuGet package is used to access and use the Azure Redis Cache. Add this to your project.

In the Startup class, add the distributed Redis cache using the AddDistributedRedisCache extension method from the NuGet package.

services.AddDistributedRedisCache(options =>
{
	options.Configuration = 
	  Configuration.GetConnectionString("RedisCacheConnection");
	options.InstanceName = "MvcHybridBackChannelInstance";
});

Add the Redis connection string to the app.settings. This example using the RedisCacheConnection. The values for this can be copied from the access keys tab in the Redis/Access keys menu which was created above.

The connection string should be added as a secret to the application, and not committed in the code.

"ConnectionStrings": {
    "RedisCacheConnection": "redis-connection-string"
},

Using the Cache for the Back-Channel logout

The LogoutSessionManager class uses the Azure Redis cache to add or get the different logouts. The OpenID Connect back-channel specification defines how this logout works. The Secure Token Server, implemented using IdentityServer4, requests a logout URL which is handled in the client application.

The LogoutController class is used for this. If all the validation and the checks are ok, the class uses a singleton instance of LogoutSessionManager to manage the logouts for the client. The code used in this example, was created using the IdentityServer4.Samples.

The IDistributedCache is added in the constructor and saved as a read only field in the class.

private static readonly Object _lock = new Object();
private readonly ILogger<LogoutSessionManager> _logger;
private IDistributedCache _cache;

// Amount of time to check for old sessions. If this is to long, 
// the cache will increase, or if you have many user sessions, 
// this will increase to much.
private const int cacheExpirationInDays = 8;

public LogoutSessionManager(ILoggerFactory loggerFactory, IDistributedCache cache)
{
	_cache = cache;
	_logger = loggerFactory.CreateLogger<LogoutSessionManager>();
}

When a logout is initialized by a user, from an application, this request is sent to the OpenID Connect server. The server does the logout logic, and sends requests back to all applications that have the back-channel configured.

The LogoutController handles this request from the Secure Token Server, and adds a key pair to the Redis cache using the sid and the sub.

The Redis cache is shared between all instances of the client application and needs to be thread safe. Then all client instances can check if the user, application needs to be logged out.

public void Add(string sub, string sid)
{
	_logger.LogWarning($"Add a logout to the session: sub: {sub}, sid: {sid}");
	var options = new DistributedCacheEntryOptions()
          .SetSlidingExpiration(TimeSpan.FromDays(cacheExpirationInDays));

	lock (_lock)
	{
		var key = sub + sid;
		var logoutSession = _cache.GetString(key);
		if (logoutSession != null)
		{
			var session = JsonConvert.DeserializeObject<Session>(logoutSession);
		}
		else
		{
			var newSession = new Session { Sub = sub, Sid = sid };
			_cache.SetString(key, JsonConvert.SerializeObject(newSession), options);
		}
	}
}

The IsLoggedOutAsync method is used to check if a logout request exists for the application, user. This method uses the sid and sub values, to request the Redis value, if it exists.

public async Task<bool> IsLoggedOutAsync(string sub, string sid)
{
	var key = sub + sid;
	var matches = false;
	var logoutSession = await _cache.GetStringAsync(key);
	if (logoutSession != null)
	{
		var session = JsonConvert.DeserializeObject<Session>(logoutSession);
		matches = session.IsMatch(sub, sid);
		_logger.LogInformation($"Logout session exists T/F {matches} : {sub}, sid: {sid}");
	}

	return matches;
}

The method is used in the CookieEventHandler class in the ValidatePrincipal method to end the session if a logout request was found.

public override async Task ValidatePrincipal(CookieValidatePrincipalContext context)
{
	if (context.Principal.Identity.IsAuthenticated)
	{
		var sub = context.Principal.FindFirst("sub")?.Value;
		var sid = context.Principal.FindFirst("sid")?.Value;

		if (await LogoutSessions.IsLoggedOutAsync(sub, sid))
		{
			context.RejectPrincipal();
			await context.HttpContext.SignOutAsync(
                          CookieAuthenticationDefaults.AuthenticationScheme);
		}
	}
}

The CookieEventHandler was added in the Startup to the cookie configuration.

.AddCookie(options =>
{
	options.ExpireTimeSpan = TimeSpan.FromMinutes(60);
	options.Cookie.Name = "mvchybridbc";

	options.EventsType = typeof(CookieEventHandler);
})

Now Azure Redis cache is used to handle the back-channel logouts from the Secure Token Server.

Configure IdentityServer4 for custom end session Logic

If you want more control over how and what back-channel clients receive a request, you can implement the IEndSessionRequestValidator interface when using IdentityServer4. The GetClientEndSessionUrlsAsync method could be edited to change the required clients which will be called after a logout event.

protected virtual async Task<(IEnumerable<string> frontChannel, 
     IEnumerable<BackChannelLogoutModel> backChannel)> 
  GetClientEndSessionUrlsAsync(EndSession endSession)
{
	var frontChannelUrls = new List<string>();
	var backChannelLogouts = new List<BackChannelLogoutModel>();

	List<string> backchannelLogouts = new List<string>
	{
		"mvc.hybrid.backchannel",
		"mvc.hybrid.backchanneltwo"
	};

	foreach (var clientId in backchannelLogouts)
	{

If the IEndSessionRequestValidator is implemented, this needs to be added to the ASP.NET Core IoC.

services.AddTransient<IEndSessionRequestValidator, 
   MyEndSessionRequestValidator>();

Notes, Problems

One problem with this, is that all logouts are saved to the cache for n-days. If the logouts are removed to early, the logout will not work for a client application which is opened after this, or if the logout items are kept to long, the size of the Redis cache will be very large in size, and cost.

Links:

https://joonasw.net/view/redis-cache-session-store

https://docs.microsoft.com/en-us/aspnet/core/performance/caching/distributed?view=aspnetcore-2.2#distributed-redis-cache

https://docs.microsoft.com/en-us/azure/azure-cache-for-redis/

https://blogs.msdn.microsoft.com/luisdem/2016/09/06/azure-redis-cache-on-asp-net-core/

https://openid.net/specs/openid-connect-backchannel-1_0.html

http://docs.identityserver.io/en/release/topics/signout.html

View story at Medium.com

View story at Medium.com

https://ldapwiki.com/wiki/OpenID%20Connect%20Back-Channel%20Logout

https://datatracker.ietf.org/meeting/97/materials/slides-97-secevent-oidc-logout-01

https://docs.microsoft.com/en-us/aspnet/core/fundamentals/app-state?view=aspnetcore-2.2

https://docs.microsoft.com/en-us/azure/azure-cache-for-redis/cache-dotnet-core-quickstart

Using Azure Key Vault with ASP.NET Core and Azure App Services

$
0
0

This article shows how to use an Azure Key Vault with an ASP.NET Core application deployed as an Azure App Service. The Azure App Service can use the system assigned identity to access the Key Vault. This needs to be configured in the Key Vault access policies using the service principal.

Code: https://github.com/damienbod/AspNetCoreBackChannelLogout

Create an Azure Key Vault

This is really easy, and does not require much effort. You can create an Azure Key Vault by following the Microsoft documentation here:

https://docs.microsoft.com/en-us/azure/key-vault/key-vault-get-started

Or using the Azure UI, you can create a Key Vault by clicking the “+ Create a Resource” blade and typing Key Vault in the search text input.

Fill out the inputs as required.

Now the Key Vault should be ready.

Create and Deploy the Azure App service

The second step is to deploy the ASP.NET Core application to Azure as an Azure App Service. You can do this in Visual Studio, or with templates from a build. Once the application is deployed, check that the Identity blade is configured correctly.

In the “App Services” blade, click the application which was deployed, and then the Identity blade. The Status must be “On” for the system assigned tab.

See the Microsoft docs for Azure App Services deployments.

Add the Access Policy in the Key Vault for the App Service

Now that the Azure App Service is ready, the Key Vault must be configured to permit the App Service application access. In the Key Vault, click the “Access Policies” blade, and then “Add new

Then click the “Select principal” and search for the Azure App service which was created above. Make sure that the required permissions are activated when configuring. Normally only the GET and List permissions are required. Click save, and check that the permissions are really saved after you have saved.

Now the Azure App Service can access the Key Vault.

Add some secrets to the Key Vault:

The secrets can be added in different formats. See the Microsoft docs for secret text formats. Any app.settings.json format can be matched.

Configure the application to use the Key Vault for configuration values

The application now requires code to use the Azure Key Vault. Add the Microsoft.Extensions.Configuration.AzureKeyVault NuGet package to the project.

Add the Azure Key Vault configuration to the Program.cs file in the ASP.NET Core application. Add this in the BuildWebHost method using the ConfigureAppConfiguration method. The app.settings configuration value AzureKeyVaultEndpoint should have the DNS Name value of the Key Vault. This can be found in the overview of the Key Vault which was created. Then add the Key Vault to the application as follows:

public static IWebHost BuildWebHost(string[] args) =>
 WebHost.CreateDefaultBuilder(args)
 .ConfigureAppConfiguration((context, config) =>
 {
    var builder = config.Build();

    var keyVaultEndpoint = builder["AzureKeyVaultEndpoint"];

    var azureServiceTokenProvider = new AzureServiceTokenProvider();

    var keyVaultClient = new KeyVaultClient(
      new KeyVaultClient.AuthenticationCallback(
        azureServiceTokenProvider.KeyVaultTokenCallback)
      );

    config.AddAzureKeyVault(keyVaultEndpoint);
 })
 .UseStartup<Startup>()

Remove any Configuration builders from the Startup constructor. The IConfiguration should be used, not created here.

public IConfiguration Configuration { get; }

public Startup(IConfiguration configuration, IHostingEnvironment env)
{
	JwtSecurityTokenHandler.DefaultInboundClaimTypeMap.Clear();
	Configuration = configuration;
	_environment = env;
}

Add the Key Vault developer values, to the app.settings as required, or add the secret values for development to the secrets.json file.

{
  "ConnectionStrings": {
    "RedisCacheConnection": "redis-connection-string"
  },
  "Logging": {
    "IncludeScopes": false,
    "LogLevel": {
      "Default": "Debug",
      "System": "Information",
      "Microsoft": "Information"
    }
  },
  "AuthConfiguration": {
    "StsServerIdentityUrl": "https://localhost:44318",
    "Audience": "mvc.hybrid.backchannel"
  },
  "SecretMvcHybridBackChannel": "secret"
}

The configuration values will be set from the Key Vault first. If no Key Vault item exists, then the secrets.json file will be used, and after this, the app.settings.json file.

The Key Vault values can be used anywhere in the ASP.NET Core application by using the standard configuration interfaces.

The following demo uses the Test configuration value which is read from the Key Vault.

private AuthConfiguration _optionsAuthConfiguration;

private IConfiguration _configuration;

public HomeController(IOptions<AuthConfiguration> optionsAuthConfiguration, IConfiguration configuration)
{
	_configuration = configuration;
	_optionsAuthConfiguration = optionsAuthConfiguration.Value;
}

public IActionResult Index()
{
	var cs = _configuration["Test"];
	return View("Index",  cs);
}

Links

https://social.technet.microsoft.com/wiki/contents/articles/51871.net-core-2-managing-secrets-in-web-apps.aspx#AzureKeyVault_Secrets

https://docs.microsoft.com/en-us/azure/key-vault/key-vault-developers-guide

https://jeremylindsayni.wordpress.com/2018/03/15/using-the-azure-key-vault-to-keep-secrets-out-of-your-web-apps-source-code/

https://stackoverflow.com/questions/40025598/azure-key-vault-access-denied

https://cmatskas.com/securing-asp-net-core-application-settings-using-azure-key-vault/

https://github.com/jayendranarumugam/DemoSecrets/tree/master/DemoSecrets

https://docs.microsoft.com/en-us/cli/azure/install-azure-cli-windows?view=azure-cli-latest

Deploying ASP.NET Core App Services using Azure Key Vault and Azure Resource Manager templates

$
0
0

This article shows how to create an Azure Resource Manager (ARM) template which uses an Azure Key Vault. The ARM template is used to deploy an ASP.NET Core application as an Azure App Service. By using an Azure Resource Group project, the secret app settings can be fetched from the Azure Key Vault during deployment, and deployed to the Azure App Service. This makes it easy to automate the whole deployment process, and no secrets are added to the source.

Different services can then use the same secrets from the Azure Key Vault, so it is easy to change the secrets regularly. The Key Vault is only used during deployment.

A problem with this approach is that if secrets are shared across services, then all services need to be updated at the same time when the secret is changed. If the services were using the secrets directly, then the secret could be updated directly, although the services would have to use the new value, which usually means an application restart.

Code: https://github.com/damienbod/AspNetCoreBackChannelLogout

Posts in this series:

Create an Azure Resource Group project

In Visual Studio, click the Cloud menu, and select a “Azure Resource Group” type.

Then choose a Web APP as the target project will be deployed as an Azure App Service.

Add some Application settings to the WebSite. You can right click the Website blade in the Json Outline window.

You can validate the template using the Azure CLI. You can also deploy this to Azure using Visual Studio (Right click the project). Deploy this to the same Resource Group as the Key Vault which you have already created, or need to create.

Microsoft Documentation for Visual Studio

Configure the Key Vault for the template

Before the Key Vault can be used in an Azure ARM template, this needs to be activated in the Key Vault. Open the Key Vault in Azure, select the Access Policies blade, then Click to show advanced access policies. Set the Enable access to Azure Resource Manager for template deployment.

Using a Key Vault secret in the ARM template

The ARM template can now use the Azure Key Vault to set application settings. A parameter will be used for this. In the properties where the application settings are defined, add a new parameter which will be used for the Key Vault value. The name of the parameter is internal to the ARM template. In the following example, the app setting ClientSecret uses the ARM template parameter ‘name_of_parameter_in_template’

"resources": [
{
  "name": "appsettings",
  "type": "config",
  "apiVersion": "2015-08-01",
  "dependsOn": [
	"[resourceId('Microsoft.Web/sites', variables('webSiteName'))]"
  ],
  "tags": {
	"displayName": "app"
  },
  "properties": {
	"ClientSecret": "[parameters('name_of_parameter_in_template')]",
	"ConnectionStrings:RedisCacheConnection": "[parameters('redisCacheConnection')]"
	"AuthConfiguration:StsServerIdentityUrl": "https//localhost:44318",
  }
}]

This is the code which matters:

[parameters('name_of_parameter_in_template')]

Add the parameter as a securestring in the template. You can navigate to this by using the Json Outline window in Visual Studio. The parameter used above, needs to be defined here, ie: ‘name_of_parameter_in_template’

 "parameters": {
    "name_of parameter_in_template": {
      "type": "securestring"
    },

In the WebSite.parameters.json file, add the Key Vault configuration. Use the parameter defined above, ‘name_of_parameter_in_template’ and add the Azure Key Vault using the reference json object. This object has two properties, a keyVault which requires the id, and the name of the secret.

Open the Azure Key Vault and click the Properties blade. The RESOURCE ID is the id which is required here. The secretName is the name of the secret in the secrets blade, which will be used.

"name_of_parameter_in_template": {
  "reference": {
     "keyVault": {
          "id": "/subscriptions/..."
     },
     "secretName": "SecretMvcHybridBackChannel2"
  }
},

When the ARM template is deployed, the application setting will use the Key Vault secret to get the value, and deploy this as an application setting in the Azure App Service. The application can then use the application setting. You need to deploy the ASP.NET Core application to the newly created Azure App Service.

Links

https://docs.microsoft.com/en-us/azure/azure-resource-manager/vs-azure-tools-resource-groups-deployment-projects-create-deploy#deploy-code-with-your-infrastructure

https://docs.microsoft.com/en-us/azure/azure-resource-manager/

https://social.technet.microsoft.com/wiki/contents/articles/51871.net-core-2-managing-secrets-in-web-apps.aspx#AzureKeyVault_Secrets

https://docs.microsoft.com/en-us/azure/virtual-machines/azure-cli-arm-commands

https://docs.microsoft.com/en-us/azure/key-vault/key-vault-developers-guide

https://jeremylindsayni.wordpress.com/2018/03/15/using-the-azure-key-vault-to-keep-secrets-out-of-your-web-apps-source-code/

https://stackoverflow.com/questions/40025598/azure-key-vault-access-denied

https://cmatskas.com/securing-asp-net-core-application-settings-using-azure-key-vault/

https://github.com/jayendranarumugam/DemoSecrets/tree/master/DemoSecrets

https://docs.microsoft.com/en-us/cli/azure/install-azure-cli-windows?view=azure-cli-latest

Is a SPA less secure than a server rendered web application?

$
0
0

In this post, I try to explain some of the differences between a single page application and a server rendered application and why the application types have different threat models.

What is an Single Page Application (SPA)?

A single page application runs in the browser, and handles routing in the client without posting back to the server. These applications are usually implemented in technologies like Angular, React or Vue.js. The SPA usually has some sort of back-end API, which provides data for the application. The SPA then uses this data and renders it to HTML, usually using Javascript.

What is a server rendered web application?

A server rendered application renders HTML on the server and sends the HTML to the client browser. The routing is done on the server. This means more of the application, compared to the SPA, is run in a trusted zone. OpenID Connect Code flow, or the OpenID Connect Hybrid flow could be used for authentication and authorization and cookies are used to persist the session.

First difference is the amount of code run and used in the public zone

More code is run in the public zone in a SPA application, which means a larger part of the application is opened for attack. The UI usually implements some type of authorization switches, and this is all done in the browser. If this is implemented without the security protections, it could be attacked, but on a server rendered app, only the result is returned to the public zone. In a server rendered app, the authorization and the authentication is done on the server.

Securing the SPA application using cookies

When the SPA application uses an API on the same domain, with LAX or Strict Same site cookies and HTTP only, then cookie-based authentication can be used. Cookies are used to persist the session, like the server rendered application. Anti-Forgery cookies would be required and also a good CSP and XSS protection. Both the Anti-Forgery cookies and the Same Site cookie help prevent cross site attacks.

The SPA application does not handle tokens, and does not need to save these to a local storage , or session storage. The SPA can only use APIs in the same domain, and all APIs would need cross site protection. The requests are sent with the cookie which can be used on the server. This is only slightly worse than the server rendered application, with the only difference being the amount of code run in the public zone, meaning a greater risk for security mistakes. The public API is also required for a SPA. The server rendered application does not need a public API.

Securing the SPA using OIDC code flow with PCKE

If the SPA uses APIs from a different domain, then it needs access tokens, and also needs to manage these in the browser. This has disadvantages compared to the server rendered web application. Nothing what is done in the browser can be trusted.

The user can authenticate and authorize using the OpenID Connect code flow with PKCE. See these two specifications for details:

https://tools.ietf.org/html/rfc7636

https://openid.net/specs/openid-connect-core-1_0.html

This returns an access token, or a reference to an access token, and a JWT id_token. When validated and all is ok, the SPA needs to persist the tokens somewhere, for later usage. This is usually saved to local storage or session storage in the browser. The SPA application sends the access token with web socket requests, or HTTP API requests. The access token is being managed and used in the public zone, so greater risk exists, that the token could be leaked. This can be reduced by using reference tokens to the access tokens, and also by keeping the life span of the token short. Sending the token in the URL should be avoided where possible and the tokens should be handled with care. For example, if you use APIs from different hosts, the incorrect token should not be automatically sent.

So is a SPA less secure than a server rendered web application?

Yes/No, it depends. Per definition, more code from the application is run in the public zone, and so has a larger attack surface, but it does not need to be less secure, by using the correct precautions. Also for example, if an ASP.NET Core MVC application uses lots of Javascript and ajax requests, this is not much different to a SPA same domain application.

Links:

https://www.owasp.org/index.php/SameSite

https://dotnetcoretutorials.com/2017/01/15/httponly-cookies-asp-net-core/

https://tools.ietf.org/html/draft-parecki-oauth-browser-based-apps-02

The State of the Implicit Flow in OAuth2

https://tools.ietf.org/html/rfc7636

https://openid.net/specs/openid-connect-core-1_0.html

https://docs.microsoft.com/en-us/aspnet/core/security/?view=aspnetcore-2.2

An alternative way to secure SPAs (with ASP.NET Core, OpenID Connect, OAuth 2.0 and ProxyKit)

https://docs.microsoft.com/en-us/aspnet/core/security/anti-request-forgery?view=aspnetcore-2.2


Using Azure Key Vault from a non-Azure App

$
0
0

In this article, I show how Azure Key Vault can be used with a non Azure application. An example of this, is a console application used for data migrations, or data seeding during release pipelines. This app could then read the secret connection strings from the Key Vault, and then do the app logic as required.

Code: https://github.com/damienbod/AspNetCoreBackChannelLogout

Posts in this series:

Create a Key Vault

You can create an Azure Key Vault by following the Microsoft documentation here:

https://docs.microsoft.com/en-us/azure/key-vault/key-vault-get-started

Or using the Azure UI, you can create a Key Vault by clicking the “+ Create a Resource” blade and typing Key Vault in the search text input.

Fill out the inputs as required.

Now the Key Vault should be ready.

Create an Azure AD Application

To connect from a non Azure application, an Azure AD Application Registration needs to be added. Click Azure Active Directory, and then in the new blade App registrations (Preview). This will probably be renamed soon. Click the New registration.

In the new blade, Register a new application. Give it a name and save.

Wait a bit, and the AAD Application registration will be created. Save the Application (client) ID somewhere as this is required in the code.

Now a secret for the AAD Application registration needs to be created. Click the Certificates & secrets button, and then New client secret.

Configure the secret, give it a description and define how long it should remain active.

Save the secret somewhere, as this is required in the code, to access the Key Vault.

Configure the Azure Key Vault to allow the Azure AD Application

In the Azure Key Vault, the AAD Application registration needs to be given access rights.
Open the Key Vault, and click the Access policies. Then click the Add new button.

Select the AAD Application registration principle which was created before. You can find this, by entering the name. In this example, it was called standalone. Then give it the required permissions and save.

Also save when you re-enter to the Key Vault blade after clicking save.

Create your Standalone Application and use the Azure Key Vault

Now the application, which can be run anywhere, and use the Key Vault secrets, can be configured and created. In this example, a console application is created, which uses the Microsoft.AspNetCore.App and the Microsoft.Extensions.Configuration.AzureKeyVault.

You could also create a web application, or whatever. A console application could be used for example, to do migrations or data seeding in a build pipeline.

<Project Sdk="Microsoft.NET.Sdk">

  <PropertyGroup>
    <OutputType>Exe</OutputType>
    <TargetFramework>netcoreapp2.2</TargetFramework>
  </PropertyGroup>

  <ItemGroup>
    <PackageReference Include="Microsoft.AspNetCore.App" Version="2.2.1" />
    <PackageReference Include="Microsoft.Extensions.Configuration.AzureKeyVault" Version="2.2.0" />
  </ItemGroup>

  <ItemGroup>
    <None Update="appsettings.json">
      <CopyToOutputDirectory>Always</CopyToOutputDirectory>
    </None>
  </ItemGroup>

</Project>

Now configure the application to use the Key Vault. This is done using the AddAzureKeyVault extension method, with the 3 parameters using the data from above; the DNS name of the Key vault, the AAD Application Registration Application ID, and the Secret.

var dnsNameKeyVault = _config["DNSNameKeyVault"];

if (!string.IsNullOrWhiteSpace(dnsNameKeyVault))
{
  configBuilder.AddAzureKeyVault($"{dnsNameKeyVault}",
   _config["AADAppRegistrationAppId"], 
   _config["AADAppRegistrationAppSecret"]);

  _config = configBuilder.Build();
}

The program reads the configuration from the app settings, adds the services, and displays the Key Vault secret.

using Microsoft.Extensions.Configuration;
using Microsoft.Extensions.DependencyInjection;
using System;
using System.IO;
using System.Reflection;

namespace ConsoleStandaloneUsingAzureSecrets
{
    class Program
    {
        private static IConfigurationRoot _config;
        private static IServiceProvider _services;

        static void Main(string[] args)
        {
            Console.WriteLine("Console APP using Azure Key Vault");

            GetConfigurationsForEnvironment();

            SetupServices();

            // read config value
            var someSecret = _config["SomeSecret"];

            Console.WriteLine($"Read from key vault: {someSecret}");
            Console.ReadLine();
        }

        private static void SetupServices()
        {
            var serviceCollection = new ServiceCollection();

            // Do migration, seeding logic or whatever

            _services = serviceCollection.BuildServiceProvider();
        }

        private static void GetConfigurationsForEnvironment()
        {
            var environmentName = Environment.GetEnvironmentVariable("ASPNETCORE_ENVIRONMENT");
            var location = Assembly.GetEntryAssembly().Location;
            var directory = Path.GetDirectoryName(location);

            Console.WriteLine($"{directory}{Path.DirectorySeparatorChar}appsettings.json");
            Console.WriteLine($"{environmentName}");

            var configBuilder = new ConfigurationBuilder()
           .AddJsonFile($"{directory}{Path.DirectorySeparatorChar}appsettings.json", false, true)
           .AddJsonFile($"{directory}{Path.DirectorySeparatorChar}appsettings.{environmentName}.json", true, true)
           .AddEnvironmentVariables();
            _config = configBuilder.Build();

            var dnsNameKeyVault = _config["DNSNameKeyVault"];

            if (!string.IsNullOrWhiteSpace(dnsNameKeyVault))
            {
                configBuilder.AddAzureKeyVault($"{dnsNameKeyVault}",
                        _config["AADAppRegistrationAppId"], 
                        _config["AADAppRegistrationAppSecret"]);

                _config = configBuilder.Build();
            }
        }
    }
}

The appsettings.json file contains the values used above. If this was a real application, you should not save the secret to the app settings. These values could be left empty, and set during a deployment, for example using Azure Devops. Or in a web application, you could use user secrets.

Thes values here are no longer valid. If you want to run the code locally, these need to be set to correct values.

{
  "DNSNameKeyVault": "https://standalone-kv.vault.azure.net/",
  "AADAppRegistrationAppId": "7faea48d-141e-41f9-9d9e-4ec9fd93ead0",
  "AADAppRegistrationAppSecret": "OWs6u2hY{F$UjXB5j7l&&DeNk9+$at{y/!pg!1Xh8MB@L",

  "SomeSecret": "DEV_VALUE"
}

You must also configure a secret in the key Vault which will be read in the standalone

Running the Application

Using the Key vault values:

When the application is started, with correct Key Vault and AAD application registration values, the configuration is read from the Key Vault.

If the DNSNameKeyVault property is not set, the development settings in the appsettings.json is used.

Links

https://social.technet.microsoft.com/wiki/contents/articles/51871.net-core-2-managing-secrets-in-web-apps.aspx#AzureKeyVault_Secrets

https://docs.microsoft.com/en-us/azure/key-vault/key-vault-developers-guide

https://jeremylindsayni.wordpress.com/2018/03/15/using-the-azure-key-vault-to-keep-secrets-out-of-your-web-apps-source-code/

https://stackoverflow.com/questions/40025598/azure-key-vault-access-denied

https://cmatskas.com/securing-asp-net-core-application-settings-using-azure-key-vault/

https://github.com/jayendranarumugam/DemoSecrets/tree/master/DemoSecrets

https://docs.microsoft.com/en-us/cli/azure/install-azure-cli-windows?view=azure-cli-latest

ASP.NET Core OAuth Device Flow Client with IdentityServer4

$
0
0

This article shows how to implement the OAuth 2.0 Device Flow for Browserless and Input Constrained Devices in an ASP.NET Core application. The tokens are then saved to a cookie for later usage. IdentityServer4 is used to implement the secure token server.

Code: https://github.com/damienbod/AspNetCoreHybridFlowWithApi

Note: The code in the this blog was built using the example from leastprivilege’s github repo AspNetCoreSecuritySamples. This was then adapted for an ASP.NET Core Razor Page application.

Creating the Client Login

The ASP.NET Core application is setup to login using the OAuth Device flow. When the user clicks the login, 4 things happen, the device code, user code is requested from the server, the device code is saved to an ASP.NET Core session, and the login page starts to poll the STS for a successful login and the QRCode is displayed so that the user can login with a mobile device, or just enter the login URL directly.

The Login OnGetAsync method, resets the user session, and signs out, if already signed in. Cookie Authentication is used to save the session once logged in. The device flow is started by called the BeginLogin method. When the method completes, the session data is set, and the page view is returned.

public async Task OnGetAsync()
{
	HttpContext.Session.SetString("DeviceCode", string.Empty);

	await HttpContext.SignOutAsync(CookieAuthenticationDefaults.AuthenticationScheme);

	var deviceAuthorizationResponse = await _deviceFlowService.BeginLogin();
	AuthenticatorUri = deviceAuthorizationResponse.VerificationUri;
	UserCode = deviceAuthorizationResponse.UserCode;

	if (string.IsNullOrEmpty(HttpContext.Session.GetString("DeviceCode")))
	{
		HttpContext.Session.SetString("DeviceCode", deviceAuthorizationResponse.DeviceCode);
		HttpContext.Session.SetInt32("Interval", deviceAuthorizationResponse.Interval);
	}
}

The BeginLogin sends a code request using the RequestDeviceAuthorizationAsync method from the IdentityModel Nuget package. The required scopes are added to the request, and the ClientId is set to match the server configuration for this client.

internal async Task<DeviceAuthorizationResponse> BeginLogin()
{
	var discoClient = new DiscoveryClient(_authConfigurations.Value.StsServer);
	var disco = await discoClient.GetAsync();
	if (disco.IsError)
	{
		throw new ApplicationException($"Status code: {disco.IsError}, Error: {disco.Error}");
	}

	var client = _clientFactory.CreateClient();
	var deviceAuthorizationRequest = new DeviceAuthorizationRequest
	{
		Address = disco.DeviceAuthorizationEndpoint,
		ClientId = "deviceFlowWebClient"
	};
	deviceAuthorizationRequest.Scope = "email profile openid";
	var response = await client.RequestDeviceAuthorizationAsync(deviceAuthorizationRequest);

	if (response.IsError)
	{
		throw new Exception(response.Error);
	}

	return response;
}

The ASP.NET Core session and the Cookie authentication are setup in the Startup class. The session is added using the AddSession extension method, and then added using the UseSession in the Configure method.

Cookie Authentication is added to save the logged-in user. The UseAuthentication method is added to the Configure method. The IHttpContextAccessor is added to the IoC so that we can show the user name in the razor page views.

using Microsoft.AspNetCore.Authentication.Cookies;
using Microsoft.AspNetCore.Authentication.OpenIdConnect;
using Microsoft.AspNetCore.Builder;
using Microsoft.AspNetCore.Hosting;
using Microsoft.AspNetCore.Http;
using Microsoft.AspNetCore.Mvc;
using Microsoft.Extensions.Configuration;
using Microsoft.Extensions.DependencyInjection;
using System;

namespace DeviceFlowWeb
{
    public class Startup
    {
        private string stsServer = "";
        public IConfiguration Configuration { get; }
        public Startup(IConfiguration configuration)
        {
            Configuration = configuration;
        }

        // This method gets called by the runtime. Use this method to add services to the container.
        public void ConfigureServices(IServiceCollection services)
        {
            services.AddScoped<DeviceFlowService>();
            services.AddHttpClient();
            services.Configure<AuthConfigurations>(Configuration.GetSection("AuthConfigurations"));

            services.AddDistributedMemoryCache();

            services.AddSession(options =>
            {
                // Set a short timeout for easy testing.
                options.IdleTimeout = TimeSpan.FromSeconds(60);
                options.Cookie.HttpOnly = true;
            });

            services.Configure<CookiePolicyOptions>(options =>
            {
                // This lambda determines whether user consent for non-essential cookies is needed for a given request.
                options.CheckConsentNeeded = context => true;
                options.MinimumSameSitePolicy = SameSiteMode.None;
            });

            var authConfigurations = Configuration.GetSection("AuthConfigurations");
            stsServer = authConfigurations["StsServer"];

            services.AddAuthentication(options =>
            {
                options.DefaultScheme = CookieAuthenticationDefaults.AuthenticationScheme;
            })
            .AddCookie();

            services.AddAuthorization();
            services.AddSingleton<IHttpContextAccessor, HttpContextAccessor>();

            services.AddMvc(options =>
            {
                options.Filters.Add(new MissingSecurityHeaders());
            }).SetCompatibilityVersion(CompatibilityVersion.Version_2_2);
        }

        public void Configure(IApplicationBuilder app, IHostingEnvironment env)
        {
            ...

            app.UseAuthentication();

            app.UseSession();

            app.UseMvc();
        }
    }
}

The Login Razor Page implements an OnPost method, which polls the server for a successful login. This is called using Javascript as soon as the page opens. The results from the OnGet are displayed in this view. The login link is displayed using a QRCode so that a mobile device could scan this and login. The user code is also displayed, which needs to be entered when logging in. The button to get the tokens is not required, this is just displayed for the demo.

@page
@model DeviceFlowWeb.Pages.LoginModel
@{
    ViewData["Title"] = "Login";
    Layout = "~/Pages/Shared/_Layout.cshtml";
}


Login: <p>@Model.AuthenticatorUri</p>

<br />

User Code: <p>@Model.UserCode</p>
<br />
<br />

<div id="qrCode"></div>
<div id="qrCodeData" data-url="@Html.Raw(Model.AuthenticatorUri)"></div>

<br />
<br />

<form data-ajax="true"  method="post" data-ajax-method="POST">
    <button class="btn btn-secondary" name="begin_token_check" id="begin_token_check" type="submit">Get tokens</button>
</form>

@section scripts {
<script src="~/js/qrcode.min.js"></script>
<script type="text/javascript">
        new QRCode(document.getElementById("qrCode"),
            {
                text: "@Html.Raw(Model.AuthenticatorUri)",
                width: 150,
                height: 150
            });

    $(document).ready(() => {
        document.getElementById('begin_token_check').click();
    });

</script>
}

The OnPostAsync method uses the RequestTokenAsync method from the service to get the tokens. This polls the server if a valid device code exists and tries to get the tokens. If the user has logged in, the tokens will be returned. This code could be optimized to remove the thread sleep calls, and use a background service.

internal async Task<TokenResponse> RequestTokenAsync(string deviceCode, int interval)
{
	var discoClient = new DiscoveryClient(_authConfigurations.Value.StsServer);
	var disco = await discoClient.GetAsync();
	if (disco.IsError)
	{
		throw new ApplicationException($"Status code: {disco.IsError}, Error: {disco.Error}");
	}

	var client = _clientFactory.CreateClient();

	while (true)
	{
		if(!string.IsNullOrWhiteSpace(deviceCode))
		{
			var response = await client.RequestDeviceTokenAsync(new DeviceTokenRequest
			{
				Address = disco.TokenEndpoint,
				ClientId = "deviceFlowWebClient",
				DeviceCode = deviceCode
			});

			if (response.IsError)
			{
				if (response.Error == "authorization_pending" || response.Error == "slow_down")
				{
					Console.WriteLine($"{response.Error}...waiting.");
					Thread.Sleep(interval * 1000);
				}
				else
				{
					throw new Exception(response.Error);
				}
			}
			else
			{
				return response;
			}
		}
		else
		{
			// lets wait
			Thread.Sleep(interval * 1000);
		}
		
	}
}

Adding the token claims to the Cookie

The OnPostAsync method calls the RequestTokenAsync method, using the session data. Once the tokens are returned, these are added to a cookie and used to add the claims to the auth cookie, and the user in logged in. The HttpContext.SignInAsync method is used for this with the claims from the tokens.

public async Task<IActionResult> OnPostAsync()
{
	var deviceCode = HttpContext.Session.GetString("DeviceCode");
	var interval = HttpContext.Session.GetInt32("Interval");

	if(interval.GetValueOrDefault() <= 0)
	{
		interval = 5;
	}

	var tokenresponse = await _deviceFlowService.RequestTokenAsync(deviceCode, interval.Value);

	if (tokenresponse.IsError)
	{
		ModelState.AddModelError(string.Empty, "Invalid login attempt.");
		return Page();
	}

	var claims = GetClaims(tokenresponse.IdentityToken);

	var claimsIdentity = new ClaimsIdentity(
		claims, 
		CookieAuthenticationDefaults.AuthenticationScheme, 
		"name", 
		"user");

	var authProperties = new AuthenticationProperties();

	// save the tokens in the cookie
	authProperties.StoreTokens(new List<AuthenticationToken>
	{
		new AuthenticationToken
		{
			Name = "access_token",
			Value = tokenresponse.AccessToken
		},
		new AuthenticationToken
		{
			Name = "id_token",
			Value = tokenresponse.IdentityToken
		}
	});

	await HttpContext.SignInAsync(
		CookieAuthenticationDefaults.AuthenticationScheme,
		new ClaimsPrincipal(claimsIdentity),
		authProperties);

	return Redirect("/Index");
}

private IEnumerable<Claim> GetClaims(string token)
{
	var validJwt = new JwtSecurityToken(token);
	return validJwt.Claims;
}

Logout

Logout is implemented using a Razor Page, and this just cleans up the auth cookies using the HttpContext.SignOutAsync method.

using Microsoft.AspNetCore.Authentication;
using Microsoft.AspNetCore.Authentication.Cookies;
using Microsoft.AspNetCore.Mvc;
using Microsoft.AspNetCore.Mvc.RazorPages;
using System.Threading.Tasks;

namespace DeviceFlowWeb.Pages
{
    public class LogoutModel : PageModel
    {
        public async Task<IActionResult> OnGetAsync()
        {
            await HttpContext.SignOutAsync(CookieAuthenticationDefaults.AuthenticationScheme);

            return Redirect("/SignedOut");
        }
    }
}

IdentityServer4 client configuration

The Device Flow client is configured using the grant type DeviceFlow. The profile claims are added to the id_token and no secret is required, as the web application client would run on a device, in an untrusted zone, so it cannot be trusted to keep a secret. The ClientId value must match the configuration on the client.

new Client
{
	ClientId = "deviceFlowWebClient",
	ClientName = "Device Flow Client",

	AllowedGrantTypes = GrantTypes.DeviceFlow,
	RequireClientSecret = false,

	AlwaysIncludeUserClaimsInIdToken = true,
	AllowOfflineAccess = true,

	AllowedScopes =
	{
		IdentityServerConstants.StandardScopes.OpenId,
		IdentityServerConstants.StandardScopes.Profile,
		IdentityServerConstants.StandardScopes.Email
	}
}

Running the APP

On the Device App and click the login:

Scan the QRCode and open in a browser, use the link:

Login with user email, or Microsoft account:

Enter the user code displayed on the Device Login page:

Give your consent:

And the Device is now logged in, received the tokens, and added them to the auth cookie.

You could now use the tokens on the standard way, to call APIs etc.

Links

https://github.com/aspnet/Docs/tree/master/aspnetcore/security/authentication/cookie/samples/2.x/CookieSample

https://docs.microsoft.com/en-us/aspnet/core/security/authentication/cookie?view=aspnetcore-2.2

Try Device Flow with IdentityServer4

https://tools.ietf.org/wg/oauth/draft-ietf-oauth-device-flow/

https://github.com/leastprivilege/AspNetCoreSecuritySamples/tree/aspnetcore21/DeviceFlow

https://www.red-gate.com/simple-talk/dotnet/net-development/using-auth-cookies-in-asp-net-core/

Securing browser based Javascript, Typescript applications

$
0
0

This article should help you in choosing the right security for your browser based Javascript or Typescript applications.

You should aim to secure the application as best as possible. The following diagram should help you in making your decision. Also for any of these flows, you should always use HTTPS.

Appendix

SPA: Single page application
OIDC: Open ID Connect
STS: Secure Token Service
PKCE: Proof Key for Code Exchange

Securing the Javascript/Typescript application using Cookies

This is the most secure way of implementing the browser based application, if done properly. This requires that the app has a trusted backend which can keep a secret. The trusted backend could for example, login using OIDC Code flow and store this data in a cookie. The Javacript application can only use the API in the same domain, and so use same site, secure, http only cookies with each request. Anti-Forgery can also be used on the API as an added protection. If using APIs from different domains, the trusted backend should make these requests, and make the data available in it’s APIs.

The application is a standalone and does not use an STS

Then you require a trusted backend which implements the auth logic.

What’s the problem with OIDC Code Flow, or Implicit Flow for an SPA application?

The main problem here is that the browser based application manages the tokens in the browser. Between the HTTP requests, the tokens needs to be persisted somewhere like the local storage.

See the links underneath for the details like what, how, why.

Links

An alternative way to secure SPAs (with ASP.NET Core, OpenID Connect, OAuth 2.0 and ProxyKit)

The State of the Implicit Flow in OAuth2

https://openid.net/developers/specs/

https://tools.ietf.org/html/draft-ietf-oauth-security-topics-12

https://datatracker.ietf.org/doc/rfc7636

Using Azure Service Bus Topics in ASP.NET Core

$
0
0

This article shows how to implement two ASP.NET Core API applications to communicate with each other using Azure Service Bus Topics. This post continues on from the last article, this time using topics and subscriptions to communicate instead of a queue. By using a topic with subscriptions, and message can be sent to n receivers.

Code: https://github.com/damienbod/AspNetCoreServiceBus

Posts in this series:

Setting up the Azure Service Bus Topics

The Azure Service Bus Topic and the Topic Subscription need to be setup in Azure, either using the portal or scripts.

You need to create a Topic in the Azure Service Bus:

In the new Topic, add a Topic Subscription:

ASP.NET Core applications

The applications are setup like in the first post in this series. This time the message bus uses a topic and a subscription to send the messages.

Implementing the Azure Service Bus Topic sender

The messages are sent using the ServiceBusTopicSender class. This class uses the Azure Service Bus connection string and a topic path which matches what was configured in the Azure portal. A new TopicClient is created, and this can then be used to send messages to the topic.

using Microsoft.Azure.ServiceBus;
using Microsoft.Extensions.Configuration;
using Microsoft.Extensions.Logging;
using Newtonsoft.Json;
using System;
using System.Text;
using System.Threading.Tasks;

namespace ServiceBusMessaging
{
    public class ServiceBusTopicSender
    {
        private readonly TopicClient _topicClient;
        private readonly IConfiguration _configuration;
        private const string TOPIC_PATH = "mytopic";
        private readonly ILogger _logger;

        public ServiceBusTopicSender(IConfiguration configuration, 
            ILogger<ServiceBusTopicSender> logger)
        {
            _configuration = configuration;
            _logger = logger;
            _topicClient = new TopicClient(
                _configuration.GetConnectionString("ServiceBusConnectionString"),
                TOPIC_PATH
            );
        }
        
        public async Task SendMessage(MyPayload payload)
        {
            string data = JsonConvert.SerializeObject(payload);
            Message message = new Message(Encoding.UTF8.GetBytes(data));

            try
            {
                await _topicClient.SendAsync(message);
            }
            catch (Exception e)
            {
                _logger.LogError(e.Message);
            }
        }
    }
}

The ServiceBusTopicSender class is added as a service in the Startup class.

services.AddScoped<ServiceBusTopicSender>();

This service can then be used in the API to send messages to the bus, when other services need the data from the API call.

[HttpPost]
[ProducesResponseType(typeof(Payload), StatusCodes.Status200OK)]
[ProducesResponseType(typeof(Payload), StatusCodes.Status409Conflict)]
public async Task<IActionResult> Create([FromBody][Required] Payload request)
{
	if (data.Any(d => d.Id == request.Id))
	{
		return Conflict($"data with id {request.Id} already exists");
	}

	data.Add(request);

	// Send this to the bus for the other services
	await _serviceBusTopicSender.SendMessage(new MyPayload
	{
		Goals = request.Goals,
		Name = request.Name,
		Delete = false
	});

	return Ok(request);
}

Implementing an Azure Service Bus Topic Subscription

The ServiceBusTopicSubscription class implements the topic subscription. The SubscriptionClient is created using the Azure Service Bus connection string, the topic path and the subscription name. These values are the values which have been configured in Azure. The RegisterOnMessageHandlerAndReceiveMessages method is used to receive the events and send the messages on for processing in the IProcessData implementation.

using Microsoft.Azure.ServiceBus;
using Microsoft.Extensions.Configuration;
using Microsoft.Extensions.Logging;
using Newtonsoft.Json;
using System.Text;
using System.Threading;
using System.Threading.Tasks;

namespace ServiceBusMessaging
{
    public interface IServiceBusTopicSubscription
    {
        void RegisterOnMessageHandlerAndReceiveMessages();
        Task CloseSubscriptionClientAsync();
    }

    public class ServiceBusTopicSubscription : IServiceBusTopicSubscription
    {
        private readonly IProcessData _processData;
        private readonly IConfiguration _configuration;
        private readonly SubscriptionClient _subscriptionClient;
        private const string TOPIC_PATH = "mytopic";
        private const string SUBSCRIPTION_NAME = "mytopicsubscription";
        private readonly ILogger _logger;

        public ServiceBusTopicSubscription(IProcessData processData, 
            IConfiguration configuration, 
            ILogger<ServiceBusTopicSubscription> logger)
        {
            _processData = processData;
            _configuration = configuration;
            _logger = logger;

            _subscriptionClient = new SubscriptionClient(
                _configuration.GetConnectionString("ServiceBusConnectionString"), 
                TOPIC_PATH, 
                SUBSCRIPTION_NAME);
        }

        public void RegisterOnMessageHandlerAndReceiveMessages()
        {
            var messageHandlerOptions = new MessageHandlerOptions(ExceptionReceivedHandler)
            {
                MaxConcurrentCalls = 1,
                AutoComplete = false
            };

            _subscriptionClient.RegisterMessageHandler(ProcessMessagesAsync, messageHandlerOptions);
        }

        private async Task ProcessMessagesAsync(Message message, CancellationToken token)
        {
            var myPayload = JsonConvert.DeserializeObject<MyPayload>(Encoding.UTF8.GetString(message.Body));
            _processData.Process(myPayload);
            await _subscriptionClient.CompleteAsync(message.SystemProperties.LockToken);
        }

        private Task ExceptionReceivedHandler(ExceptionReceivedEventArgs exceptionReceivedEventArgs)
        {
            _logger.LogError(exceptionReceivedEventArgs.Exception, "Message handler encountered an exception");
            var context = exceptionReceivedEventArgs.ExceptionReceivedContext;

            _logger.LogDebug($"- Endpoint: {context.Endpoint}");
            _logger.LogDebug($"- Entity Path: {context.EntityPath}");
            _logger.LogDebug($"- Executing Action: {context.Action}");

            return Task.CompletedTask;
        }

        public async Task CloseSubscriptionClientAsync()
        {
            await _subscriptionClient.CloseAsync();
        }
    }
}

The IServiceBusTopicSubscription and the IProcessData, plus the implementations are added to the IoC of the ASP.NET Core application.

services.AddSingleton<IServiceBusTopicSubscription, ServiceBusTopicSubscription>();
services.AddTransient<IProcessData, ProcessData>();

The RegisterOnMessageHandlerAndReceiveMessages is called in the Configure Startup method, so that the application starts to listen for messages.

public void Configure(IApplicationBuilder app, IWebHostEnvironment env)
{
	...

	var busSubscription = 
		app.ApplicationServices.GetService<IServiceBusTopicSubscription>();
	busSubscription.RegisterOnMessageHandlerAndReceiveMessages();
}

The ProcessData service processes the incoming topic messages for the defined subscription, and adds them to an in-memory list in this demo, which can be viewed using the Swagger API.

using AspNetCoreServiceBusApi2.Model;
using ServiceBusMessaging;

namespace AspNetCoreServiceBusApi2
{
    public class ProcessData : IProcessData
    {
        public void Process(MyPayload myPayload)
        {
            DataServiceSimi.Data.Add(new Payload
            {
                Name = myPayload.Name,
                Goals = myPayload.Goals
            });
        }
    }
}

If only the ASP.NET Core application which sends messages is started, and a POST is called to for the topic API, a message will be sent to the Azure Service Bus topic. This can then be viewed in the portal.

If the API from the application which receives the topic subscriptions is started, the message will be sent and removed from the topic subscription.

Links:

https://docs.microsoft.com/en-us/azure/service-bus-messaging/

https://docs.microsoft.com/en-us/azure/service-bus-messaging/service-bus-dotnet-get-started-with-queues

https://www.nuget.org/packages/Microsoft.Azure.ServiceBus

Azure Service Bus Topologies

https://docs.microsoft.com/en-us/dotnet/standard/microservices-architecture/multi-container-microservice-net-applications/integration-event-based-microservice-communications

Always subscribe to Dead-lettered messages in an Azure Service Bus

Passing Javascript values to ASP.NET Core View components

$
0
0

In this post, I show how an ASP.NET Core MVC view can send a Javascript parameter value to an ASP.NET Core view component. Invoking a view component in the view using ‘@await Component.InvokeAsync’ will not work, as this is rendered before the Javascript value has been created.

Code: https://github.com/damienbod/AspNetCoreBootstrap4Validation

History

2019-01-24 Added an Anti-Forgery token to Javascript view component ajax request

Creating the view component

The view component is setup in the standard way as described in the Microsoft docs:

The view component called MyComponent was created which uses the MyComponentModel model. This model is used to pass the parameters to the component and also to display the view. The ScreenWidth property is read from a Javascript value, and set in the model.

using AspNetCoreBootstrap4Validation.ViewModels;
using Microsoft.AspNetCore.Mvc;

namespace AspNetCoreBootstrap4Validation.Views
{
    public class MyComponent : ViewComponent
    {
        public MyComponent() {}

        public IViewComponentResult Invoke(MyComponentModel model)
        {
            model.ScreenWidth = "Read on the server:" + model.ScreenWidth;
            return View(model);
        }
    }
}

The Default.cshtml view for the component displays the values as required.

@using AspNetCoreBootstrap4Validation.ViewModels
@model MyComponentModel

@{
    ViewData["Title"] = "View Component";
}

<h5>Result from Component:server</h5>

<text><em>ScreenWidth: </em>@Model.ScreenWidth</text>

<br />
<text><em>Name:</em> @Model.StandardValidation.Name</text><br />
<text><em>IsCool:</em> @Model.StandardValidation.IsCool</text><br />
<text><em>Age: </em>@Model.StandardValidation.Age</text><br />

An action method in an ASP.NET Core MVC controller is used to call the view component.

public class AjaxWithComponentController : Controller
{
        [HttpPost]
        [ValidateAntiForgeryToken]
        public IActionResult LoadComponent(MyComponentModel model)
        {
            return ViewComponent("MyComponent", model);
        }

Javascript using jQuery and Ajax is used to request the action method in the MVC controller, which calls the view component. The screenWidth uses the document.documentElement.clientWidth value to get the screen width and the form is serialized and sent as a Json object in the model used to request the view component.

The Anti-Forgery token needs to be added to the header for each request. See the Microsoft Docs for details.

 <script language="javascript">

        function loadComponentView() {

            var paramsFromForm = {};
            $.each($("#partialformAjaxWithComponent").serializeArray(), function (index, value) {
                paramsFromForm[value.name] = paramsFromForm[value.name] ? paramsFromForm[value.name] || value.value : value.value;
            });

            var componentData = {};

            componentData.standardValidation = paramsFromForm;
            componentData.screenWidth = document.documentElement.clientWidth;

            console.log(componentData);

            $.ajax({
                url: window.location.origin + "/AjaxWithComponent/LoadComponent",
                type: "post",
                dataType: "json",
                beforeSend: function (x) {
                    if (x && x.overrideMimeType) {
                        x.overrideMimeType("application/json;charset=UTF-8");
                    };
                    x.setRequestHeader('RequestVerificationToken', document.getElementById('RequestVerificationToken').value);   
                },
                data: componentData,
                complete: function (result) {
                    console.log(result.responseText);
                    $("#partialComponentResult").html(result.responseText);
                }
            });
        };

    </script>

The result of the ajax request is displayed in the div with the id partialComponentResult.

@model AspNetCoreBootstrap4Validation.ViewModels.StandardValidationModel
@{
    ViewData["Title"] = "Ajax with Component Page";
}

@inject Microsoft.AspNetCore.Antiforgery.IAntiforgery Xsrf
@functions{
    public string GetAntiXsrfRequestToken()
    {
        return Xsrf.GetAndStoreTokens(Context).RequestToken;
    }
}

<input type="hidden" id="RequestVerificationToken"
       name="RequestVerificationToken" value="@GetAntiXsrfRequestToken()">

<h4>Ajax with Component View</h4>

<div id="partialComponentResult">
    <h5>change a value to do a component load</h5>

    <text><em>ScreenWidth:</em> ...</text>

    <br />
    <text><em>Name:</em> ...</text><br />
    <text><em>IsCool:</em> ...</text><br />
    <text><em>Age:</em> ...</text><br />
</div>

<hr />

<form id="partialformAjaxWithComponent" onchange="loadComponentView()" method="post" asp-action="Index" asp-controller="AjaxWithComponent">

    <div asp-validation-summary="All" class="text-danger"></div>

    <div class="form-group">
        <label for="name">Name</label>
        <input type="text" class="form-control" asp-for="Name" id="name" aria-describedby="nameHelp" placeholder="Enter name">
        <small id="nameHelp" class="form-text text-muted">We'll never share your name ...</small>
        <span asp-validation-for="Name" class="text-danger"></span>
    </div>
    <div class="form-group">
        <label for="age">Age</label>
        <input type="number" class="form-control" id="age" asp-for="Age" placeholder="0">
        <span asp-validation-for="Age" class="text-danger"></span>
    </div>
    <div class="form-check ten_px_bottom">
        <input type="checkbox" class="form-check-input big_checkbox" asp-for="IsCool" id="IsCool">
        <label class="form-check-label ten_px_left" for="IsCool">IsCool</label>
        <span asp-validation-for="IsCool" class="text-danger"></span>
    </div>


    <button type="submit" class="btn btn-primary">Submit</button>
</form>

Links:

https://docs.microsoft.com/en-us/aspnet/core/mvc/views/view-components?view=aspnetcore-2.2

https://andrewlock.net/passing-variables-to-a-view-component/

https://mariusschulz.com/blog/view-components-in-asp-net-mvc-6

ASP.NET Core 2.0 MVC View Components

https://docs.microsoft.com/en-us/aspnet/core/security/anti-request-forgery?view=aspnetcore-2.2#javascript-ajax-and-spas

Using Azure Service Bus Topics Subscription Filters in ASP.NET Core

$
0
0

This article shows how to implement Azure Service Bus filters for topic subscriptions used in an ASP.NET Core API application. The application uses the Microsoft.Azure.ServiceBus NuGet package for all the Azure Service Bus client logic.

Code: https://github.com/damienbod/AspNetCoreServiceBus

Posts in this series:

Azure Service Bus Topic Sender

The topic sender from the previous post was changed to add a UserProperties item to the message called goals which will be filtered. Otherwise the sender is as before and sends the messages to the topic.

using Microsoft.Azure.ServiceBus;
using Microsoft.Extensions.Configuration;
using Microsoft.Extensions.Logging;
using Newtonsoft.Json;
using System;
using System.Text;
using System.Threading.Tasks;

namespace ServiceBusMessaging
{
    public class ServiceBusTopicSender
    {
        private readonly TopicClient _topicClient;
        private readonly IConfiguration _configuration;
        private const string TOPIC_PATH = "mytopic";
        private readonly ILogger _logger;

        public ServiceBusTopicSender(IConfiguration configuration, 
            ILogger<ServiceBusTopicSender> logger)
        {
            _configuration = configuration;
            _logger = logger;
            _topicClient = new TopicClient(
                _configuration.GetConnectionString("ServiceBusConnectionString"),
                TOPIC_PATH
            );
        }
        
        public async Task SendMessage(MyPayload payload)
        {
            string data = JsonConvert.SerializeObject(payload);
            Message message = new Message(Encoding.UTF8.GetBytes(data));
            message.UserProperties.Add("goals", payload.Goals);

            try
            {
                await _topicClient.SendAsync(message);
            }
            catch (Exception e)
            {
                _logger.LogError(e.Message);
            }
        }
        
    }
}

It is not possible to add a subscription filter to the topic using the Azure portal. To do this you need to implement it in code, or used scripts, or the Azure CLI.

The RemoveDefaultFilters method checks if the default filter exists, and if it does it is removed. It does not remove the other filters.

private async Task RemoveDefaultFilters()
{
	try
	{
		var rules = await _subscriptionClient.GetRulesAsync();
		foreach(var rule in rules)
		{
			if(rule.Name == RuleDescription.DefaultRuleName)
			{
				await _subscriptionClient.RemoveRuleAsync(RuleDescription.DefaultRuleName);
			}
		}
		
	}
	catch (Exception ex)
	{
		_logger.LogWarning(ex.ToString());
	}
}

The AddFilters method adds the new filter, if it is not already added. The filter in this demo will use the goals user property from the message and only subscribe to messages with a value greater than 7.

private async Task AddFilters()
{
	try
	{
		var rules = await _subscriptionClient.GetRulesAsync();
		if(!rules.Any(r => r.Name == "GoalsGreaterThanSeven"))
		{
			var filter = new SqlFilter("goals > 7");
			await _subscriptionClient.AddRuleAsync("GoalsGreaterThanSeven", filter);
		}
	}
	catch (Exception ex)
	{
		_logger.LogWarning(ex.ToString());
	}
}

The filter methods are added to the PrepareFiltersAndHandleMessages method. This sets up the filters, or makes sure the filters are correct on the Azure Service Bus, and then registers itself to the topic subscription to receive the messages form its subscription.

public async Task PrepareFiltersAndHandleMessages()
{
	await RemoveDefaultFilters();
	await AddFilters();

	var messageHandlerOptions = new MessageHandlerOptions(ExceptionReceivedHandler)
	{
		MaxConcurrentCalls = 1,
		AutoComplete = false,
	};

	_subscriptionClient.RegisterMessageHandler(ProcessMessagesAsync, messageHandlerOptions);
}

The Azure Service Bus classes are added to the ASP.NET Core application in the Startup class. This adds the services to the IoC and initializes the message listener.

using Microsoft.AspNetCore.Builder;
using Microsoft.AspNetCore.Hosting;
using Microsoft.Extensions.Configuration;
using Microsoft.Extensions.DependencyInjection;
using Microsoft.Extensions.Hosting;
using Microsoft.OpenApi.Models;
using ServiceBusMessaging;
using System.Threading.Tasks;

namespace AspNetCoreServiceBusApi2
{
    public class Startup
    {
        public Startup(IConfiguration configuration)
        {
            Configuration = configuration;
        }

        public IConfiguration Configuration { get; }

        public void ConfigureServices(IServiceCollection services)
        {
            ...
			
            services.AddSingleton<IServiceBusTopicSubscription, ServiceBusTopicSubscription>();
            services.AddTransient<IProcessData, ProcessData>();

        }

        public void Configure(IApplicationBuilder app, IWebHostEnvironment env)
        {
            ...
			
            var busSubscription = app.ApplicationServices.GetService<IServiceBusTopicSubscription>();
            busSubscription.PrepareFiltersAndHandleMessages().GetAwaiter().GetResult();
        }
    }
}

When the applications are started, the API2 only receives messages which have a goal value greater than seven.

Links:

https://docs.microsoft.com/en-us/azure/service-bus-messaging/

https://docs.microsoft.com/en-us/azure/service-bus-messaging/service-bus-dotnet-get-started-with-queues

https://www.nuget.org/packages/Microsoft.Azure.ServiceBus

Azure Service Bus Topologies

https://docs.microsoft.com/en-us/dotnet/standard/microservices-architecture/multi-container-microservice-net-applications/integration-event-based-microservice-communications

Always subscribe to Dead-lettered messages when using an Azure Service Bus

Using Entity Framework Core to process Azure Service Messages in ASP.NET Core

$
0
0

This article shows how to use Entity Framework Core together with an Azure Service Bus receiver in ASP.NET Core. This message handler is a singleton and so requires that an Entity Framework Core context inside this singleton is not registered as a scoped service but created and disposed for each message event.

Code: https://github.com/damienbod/AspNetCoreServiceBus

Posts in this series:

Processing the Azure Service Bus Messages

The ProcessData class is used to handle the messages in the ASP.NET Core application. The service uses an Entity Framework Core context to save the required data to a database.

using AspNetCoreServiceBusApi2.Model;
using Microsoft.Extensions.Configuration;
using ServiceBusMessaging;
using System;
using System.Threading.Tasks;

namespace AspNetCoreServiceBusApi2
{
    public class ProcessData : IProcessData
    {
        private IConfiguration _configuration;

        public ProcessData(IConfiguration configuration)
        {
            _configuration = configuration;
        }
        public async Task Process(MyPayload myPayload)
        {
            using (var payloadMessageContext = 
                new PayloadMessageContext(
                    _configuration.GetConnectionString("DefaultConnection")))
            {
                await payloadMessageContext.AddAsync(new Payload
                {
                    Name = myPayload.Name,
                    Goals = myPayload.Goals,
                    Created = DateTime.UtcNow
                });

                await payloadMessageContext.SaveChangesAsync();
            }
        }
    }
}

The services used to consume the Azure Service Bus are registered to the IoC (Inversion of Control) as singletons. Due to this, only singletons or transient services can be used. If we use the context as a singleton, we will end up having connection and pooling problems with the database.

services.AddSingleton<IServiceBusConsumer, ServiceBusConsumer>();
services.AddSingleton<IServiceBusTopicSubscription, ServiceBusTopicSubscription>();
services.AddSingleton<IProcessData, ProcessData>();

A PayloadMessageContext Entity Framework Core context was created for the Azure Service Bus message handling.

using Microsoft.EntityFrameworkCore;

namespace AspNetCoreServiceBusApi2.Model
{
    public class PayloadMessageContext : DbContext
    {
        private string _connectionString;

        public DbSet<Payload> Payloads { get; set; }
      
        public PayloadMessageContext(string connectionString)
        {
            _connectionString = connectionString;
        }

        protected override void OnConfiguring(DbContextOptionsBuilder optionsBuilder)
        {
            optionsBuilder.UseSqlite(_connectionString);
        }

        protected override void OnModelCreating(ModelBuilder builder)
        {
            builder.Entity<Payload>().Property(n => n.Id).ValueGeneratedOnAdd();
            builder.Entity<Payload>().HasKey(m => m.Id); 
            base.OnModelCreating(builder); 
        } 
    }
}

The required NuGet packages were added to the project. This demo uses SQLite.

<PackageReference Include="Microsoft.EntityFrameworkCore.Sqlite" Version="3.0.0-preview4.19216.3" />
    <PackageReference Include="Microsoft.EntityFrameworkCore.Tools" Version="3.0.0-preview4.19216.3">
      <PrivateAssets>all</PrivateAssets>
      <IncludeAssets>runtime; build; native; contentfiles; analyzers; buildtransitive</IncludeAssets>
    </PackageReference>

The service is then added in the Startup class as a singleton. The Entity Framework Core context used for the messaging is not registered here, because it is used inside the singleton instance and we do not want a context which is a singleton, because it will have problems with the database connections, and pooling. Instead a new context is created inside the service for each message event and disposed after. If you have a lot of messages, this would need to be optimized.

Now when the ASP.NET Core application receives messages, the singleton service context handles this messages, and saves the data to a database.

Links:

https://docs.microsoft.com/en-us/azure/service-bus-messaging/

https://docs.microsoft.com/en-us/azure/service-bus-messaging/service-bus-dotnet-get-started-with-queues

https://www.nuget.org/packages/Microsoft.Azure.ServiceBus

Azure Service Bus Topologies

https://docs.microsoft.com/en-us/dotnet/standard/microservices-architecture/multi-container-microservice-net-applications/integration-event-based-microservice-communications

Always subscribe to Dead-lettered messages when using an Azure Service Bus

https://ml-software.ch/posts/stripe-api-with-asp-net-core-part-3


Handling Access Tokens for private APIs in ASP.NET Core

$
0
0

This article shows how to persist access tokens for a trusted ASP.NET Core application which needs to access secure APIs. These tokens which are persisted are not meant for public clients, but are used for the service to service communication.

Code: https://github.com/damienbod/AspNetCoreHybridFlowWithApi

Posts in this series:

Setup

The software system consists of 3 applications, a web client with a UI and user, an API which is used by the web client and a secure token service, implemented using IdentityServer4.

The tokens persisted in this example are used for the communication between the web application and the trusted API in the service. The application gets the access tokens for the service to service communication. The tokens for the identities (users + application) are not used here. In the previous post, each time the user requested a view, the API service requested the disco service data (OpenID Connect well known endpoints). Then it requested the access token from the secure token service token endpoint. After it requested the API resource. We want to re-use the access tokens instead of always doing the extra 2 HTTP requests for the web UI requests.

The ApiService is used to access the API for the identity. This is a scoped or transient instance in the IoC and for each identity different.

The service uses the API token client service which is a singleton. The service is used to get the access tokens and persist them as long as the tokens are valid. The service then uses the access token to get the data from the API resource.

using Microsoft.Extensions.Options;
using Newtonsoft.Json.Linq;
using System;
using System.Net.Http;
using System.Threading.Tasks;

namespace WebHybridClient
{
    public class ApiService
    {
        private readonly IOptions<AuthConfigurations> _authConfigurations;
        private readonly IHttpClientFactory _clientFactory;
        private readonly ApiTokenCacheClient _apiTokenClient;

        public ApiService(
            IOptions<AuthConfigurations> authConfigurations, 
            IHttpClientFactory clientFactory,
            ApiTokenCacheClient apiTokenClient)
        {
            _authConfigurations = authConfigurations;
            _clientFactory = clientFactory;
            _apiTokenClient = apiTokenClient;
        }

        public async Task<JArray> GetApiDataAsync()
        {
            try
            {
                var client = _clientFactory.CreateClient();

                client.BaseAddress = new Uri(_authConfigurations.Value.ProtectedApiUrl);

                var access_token = await _apiTokenClient.GetApiToken(
                    "ProtectedApi",
                    "scope_used_for_api_in_protected_zone",
                    "api_in_protected_zone_secret"
                );

                client.SetBearerToken(access_token);

                var response = await client.GetAsync("api/values");
                if (response.IsSuccessStatusCode)
                {
                    var responseContent = await response.Content.ReadAsStringAsync();
                    var data = JArray.Parse(responseContent);

                    return data;
                }

                throw new ApplicationException($"Status code: {response.StatusCode}, Error: {response.ReasonPhrase}");
            }
            catch (Exception e)
            {
                throw new ApplicationException($"Exception {e}");
            }
        }
    }
}

The API token client service use the GetApiToken method to get the access token. It requires an API name, a scope and a secret to get the token.

var access_token = await _apiTokenClient.GetApiToken(
                    "ProtectedApi",
                    "scope_used_for_api_in_protected_zone",
                    "api_in_protected_zone_secret"
                );

The first time the ASP.NET Core instance requests an access token, it gets the well known endpoint data from the Auth server, and then gets the access token for the parameters provided. The token response is saved to a concurrent dictionary, so that it can be reused.

private async Task<AccessTokenItem> getApiToken(string api_name, string api_scope, string secret)
{
	try
	{
		var disco = await HttpClientDiscoveryExtensions.GetDiscoveryDocumentAsync(
			_httpClient, 
			_authConfigurations.Value.StsServer);

		if (disco.IsError)
		{
			_logger.LogError($"disco error Status code: {disco.IsError}, Error: {disco.Error}");
			throw new ApplicationException($"Status code: {disco.IsError}, Error: {disco.Error}");
		}

		var tokenResponse = await HttpClientTokenRequestExtensions.RequestClientCredentialsTokenAsync(_httpClient, new ClientCredentialsTokenRequest
		{
			Scope = api_scope,
			ClientSecret = secret,
			Address = disco.TokenEndpoint,
			ClientId = api_name
		});

		if (tokenResponse.IsError)
		{
			_logger.LogError($"tokenResponse.IsError Status code: {tokenResponse.IsError}, Error: {tokenResponse.Error}");
			throw new ApplicationException($"Status code: {tokenResponse.IsError}, Error: {tokenResponse.Error}");
		}

		return new AccessTokenItem
		{
			ExpiresIn = DateTime.UtcNow.AddSeconds(tokenResponse.ExpiresIn),
			AccessToken = tokenResponse.AccessToken
		};
		
	}
	catch (Exception e)
	{
		_logger.LogError($"Exception {e}");
		throw new ApplicationException($"Exception {e}");
	}
}

The GetApiToken is the public method for this service. This method checks if a valid access token exists for this API, and returns it from memory if it does. Otherwise, it gets a new token from the secure token service with the extra 2 HTTP calls.

public async Task<string> GetApiToken(string api_name, string api_scope, string secret)
{
	if (_accessTokens.ContainsKey(api_name))
	{
		var accessToken = _accessTokens.GetValueOrDefault(api_name);
		if (accessToken.ExpiresIn > DateTime.UtcNow)
		{
			return accessToken.AccessToken;
		}
		else
		{
			// remove
			_accessTokens.TryRemove(api_name, out AccessTokenItem accessTokenItem);
		}
	}

	_logger.LogDebug($"GetApiToken new from STS for {api_name}");

	// add
	var newAccessToken = await getApiToken( api_name,  api_scope,  secret);
	_accessTokens.TryAdd(api_name, newAccessToken);

	return newAccessToken.AccessToken;
}

What’s wrong with this?

The above service works well, but what if the ASP.NET Core application is deployed as a multi-instance? Each instance of the application would have it’s own in memory access tokens, which are updated each time the tokens expire. What if I want to share tokens between instances or even services? Then the software system would be making extra requests which could be optimized.

Using Cache to solve and improve performance with multiple instances

A distributed cache could be used to solve this problem. For example a Redis cache could be used to persist the access tokens for the services, and used in all trusted services which request secure API data. These are not the tokens used for the identities, but the tokens for the service to service communication. This should be in a protected zone, and if you save access tokens to a shared cache, then care has to be taken, that this cannot be abused!

The service works just like the service above except a cache is used instead of a concurrent dictionary.

using IdentityModel.Client;
using Microsoft.Extensions.Caching.Distributed;
using Microsoft.Extensions.Logging;
using Microsoft.Extensions.Options;
using Newtonsoft.Json;
using System;
using System.Net.Http;
using System.Threading.Tasks;

namespace WebHybridClient
{
    public class ApiTokenCacheClient
    {
        private readonly ILogger<ApiTokenCacheClient> _logger;
        private readonly HttpClient _httpClient;
        private readonly IOptions<AuthConfigurations> _authConfigurations;

        private static readonly Object _lock = new Object();
        private IDistributedCache _cache;

        private const int cacheExpirationInDays = 1;

        private class AccessTokenItem
        {
            public string AccessToken { get; set; } = string.Empty;
            public DateTime ExpiresIn { get; set; }
        }

        public ApiTokenCacheClient(
            IOptions<AuthConfigurations> authConfigurations,
            IHttpClientFactory httpClientFactory,
            ILoggerFactory loggerFactory,
            IDistributedCache cache)
        {
            _authConfigurations = authConfigurations;
            _httpClient = httpClientFactory.CreateClient();
            _logger = loggerFactory.CreateLogger<ApiTokenCacheClient>();
            _cache = cache;
        }

        public async Task<string> GetApiToken(string api_name, string api_scope, string secret)
        {
            var accessToken = GetFromCache(api_name);

            if (accessToken != null)
            {
                if (accessToken.ExpiresIn > DateTime.UtcNow)
                {
                    return accessToken.AccessToken;
                }
                else 
                { 
                    // remove  => NOT Needed for this cache type
                }
            }

            _logger.LogDebug($"GetApiToken new from STS for {api_name}");

            // add
            var newAccessToken = await getApiToken( api_name,  api_scope,  secret);
            AddToCache(api_name, newAccessToken);

            return newAccessToken.AccessToken;
        }

        private async Task<AccessTokenItem> getApiToken(string api_name, string api_scope, string secret)
        {
            try
            {
                var disco = await HttpClientDiscoveryExtensions.GetDiscoveryDocumentAsync(
                    _httpClient, 
                    _authConfigurations.Value.StsServer);

                if (disco.IsError)
                {
                    _logger.LogError($"disco error Status code: {disco.IsError}, Error: {disco.Error}");
                    throw new ApplicationException($"Status code: {disco.IsError}, Error: {disco.Error}");
                }

                var tokenResponse = await HttpClientTokenRequestExtensions.RequestClientCredentialsTokenAsync(_httpClient, new ClientCredentialsTokenRequest
                {
                    Scope = api_scope,
                    ClientSecret = secret,
                    Address = disco.TokenEndpoint,
                    ClientId = api_name
                });

                if (tokenResponse.IsError)
                {
                    _logger.LogError($"tokenResponse.IsError Status code: {tokenResponse.IsError}, Error: {tokenResponse.Error}");
                    throw new ApplicationException($"Status code: {tokenResponse.IsError}, Error: {tokenResponse.Error}");
                }

                return new AccessTokenItem
                {
                    ExpiresIn = DateTime.UtcNow.AddSeconds(tokenResponse.ExpiresIn),
                    AccessToken = tokenResponse.AccessToken
                };
                
            }
            catch (Exception e)
            {
                _logger.LogError($"Exception {e}");
                throw new ApplicationException($"Exception {e}");
            }
        }

        private void AddToCache(string key, AccessTokenItem accessTokenItem)
        {
            var options = new DistributedCacheEntryOptions().SetSlidingExpiration(TimeSpan.FromDays(cacheExpirationInDays));

            lock (_lock)
            {
                _cache.SetString(key, JsonConvert.SerializeObject(accessTokenItem), options);
            }
        }

        private AccessTokenItem GetFromCache(string key)
        {
            var item = _cache.GetString(key);
            if (item != null)
            {
                return JsonConvert.DeserializeObject<AccessTokenItem>(item);
            }

            return null;
        }
    }
}

This improves the performance and reduces the amount of HTTP calls for each request. The tokens for the API services are only updated when the tokens expire, and so saves many HTTP calls.

Links

https://docs.microsoft.com/en-gb/aspnet/core/mvc/overview

https://docs.microsoft.com/en-gb/aspnet/core/security/anti-request-forgery

https://docs.microsoft.com/en-gb/aspnet/core/security/

http://openid.net/

https://www.owasp.org/images/b/b0/Best_Practices_WAF_v105.en.pdf

https://tools.ietf.org/html/rfc7662

http://docs.identityserver.io/en/release/quickstarts/5_hybrid_and_api_access.html

https://github.com/aspnet/Security

Identity Server: From Implicit to Hybrid Flow

http://openid.net/specs/openid-connect-core-1_0.html#HybridFlowAuth

https://docs.microsoft.com/en-us/aspnet/core/performance/caching/distributed?view=aspnetcore-2.2

Certificate Authentication in ASP.NET Core 3.0

$
0
0

This article shows how Certificate Authentication can be implemented in ASP.NET Core 3.0. In this example, a shared self signed certificate is used to authenticate one application calling an API on a second ASP.NET Core application.

Code https://github.com/damienbod/AspNetCoreCertificateAuth

Posts in this series

History

2019-09-06: Updated Nuget packages, .NET Core 3 preview 9

Setting up the Server

Add the Certificate Authentication using the Microsoft.AspNetCore.Authentication.Certificate NuGet package to the server ASP.NET Core application.

This can also be added directly in the csproj file.

<Project Sdk="Microsoft.NET.Sdk.Web">

  <PropertyGroup>
    <TargetFramework>netcoreapp3.0</TargetFramework>
    <AspNetCoreHostingModel>OutOfProcess</AspNetCoreHostingModel>
  </PropertyGroup>

  <ItemGroup>
    <PackageReference Include="Microsoft.AspNetCore.Authentication.Certificate" 
      Version="3.0.0-preview6.19307.2" />
  </ItemGroup>

  <ItemGroup>
    <None Update="sts_dev_cert.pfx">
      <CopyToOutputDirectory>PreserveNewest</CopyToOutputDirectory>
    </None>
  </ItemGroup>

</Project>

The authentication can be added in the ConfigureServices method in the Startup class. This example was built using the ASP.NET Core documentation. The AddAuthentication extension method is used to define the default scheme as “Certificate” using the CertificateAuthenticationDefaults.AuthenticationScheme string. The AddCertificate method then adds the configuration for the certificate authentication. At present, all certificates are excepted which is not good and the MyCertificateValidationService class is used to do extra validation of the client certificate. If the validation fails, the request is failed and the request for the resource will be rejected.

public void ConfigureServices(IServiceCollection services)
{
	services.AddSingleton<MyCertificateValidationService>();

	services.AddAuthentication(CertificateAuthenticationDefaults.AuthenticationScheme)
		.AddCertificate(options => // code from ASP.NET Core sample
		{
			options.AllowedCertificateTypes = CertificateTypes.All;
			options.Events = new CertificateAuthenticationEvents
			{
				OnCertificateValidated = context =>
				{
					var validationService =
						context.HttpContext.RequestServices.GetService<MyCertificateValidationService>();

					if (validationService.ValidateCertificate(context.ClientCertificate))
					{
						var claims = new[]
						{
							new Claim(ClaimTypes.NameIdentifier, context.ClientCertificate.Subject, ClaimValueTypes.String, context.Options.ClaimsIssuer),
							new Claim(ClaimTypes.Name, context.ClientCertificate.Subject, ClaimValueTypes.String, context.Options.ClaimsIssuer)
						};

						context.Principal = new ClaimsPrincipal(new ClaimsIdentity(claims, context.Scheme.Name));
						context.Success();
					}
					else
					{
						context.Fail("invalid cert");
					}

					return Task.CompletedTask;
				}
			};
		});

	services.AddAuthorization();

	services.AddControllers();
}

The AddCertificateForwarding method is used so that the client header can be specified and how the certificate is to be loaded using the HeaderConverter option. When sending the certificate with the HttpClient using the default settings, the ClientCertificate was always be null. The X-ARR-ClientCert header is used to pass the client certificate, and the cert is passed as a string to work around this.

services.AddCertificateForwarding(options =>
{
	options.CertificateHeader = "X-ARR-ClientCert";
	options.HeaderConverter = (headerValue) =>
	{
		X509Certificate2 clientCertificate = null;
		if(!string.IsNullOrWhiteSpace(headerValue))
		{
			byte[] bytes = StringToByteArray(headerValue);
			clientCertificate = new X509Certificate2(bytes);
		}

		return clientCertificate;
	};
});

The Configure method then adds the middleware. UseCertificateForwarding is added before the UseAuthentication and the UseAuthorization.

public void Configure(IApplicationBuilder app, IWebHostEnvironment env)
{
	...
	
	app.UseRouting();

	app.UseCertificateForwarding();
	app.UseAuthentication();
	app.UseAuthorization();

	app.UseEndpoints(endpoints =>
	{
		endpoints.MapControllers();
	});
}

The MyCertificateValidationService is used to implement validation logic. Because we are using self signed certificates, we need to ensure that only our certificate can be used. We validate that the thumbprints of the client certificate and also the server one match, otherwise any certificate can be used and will be be enough to authenticate.

using System.IO;
using System.Security.Cryptography.X509Certificates;

namespace AspNetCoreCertificateAuthApi
{
    public class MyCertificateValidationService
    {
        public bool ValidateCertificate(X509Certificate2 clientCertificate)
        {
            var cert = new X509Certificate2(Path.Combine("sts_dev_cert.pfx"), "1234");
            if (clientCertificate.Thumbprint == cert.Thumbprint)
            {
                return true;
            }

            return false;
        }
    }
}

The API ValuesController is then secured using the Authorize attribute.

[Route("api/[controller]")]
[ApiController]
[Authorize]
public class ValuesController : ControllerBase
{

...

The ASP.NET Core server project is deployed in this example as an out of process application using kestrel. To use the service, a certificate is required. This is defined using the ClientCertificateMode.RequireCertificate option.

public static IWebHost BuildWebHost(string[] args)
  => WebHost.CreateDefaultBuilder(args)
  .UseStartup<Startup>()
  .ConfigureKestrel(options =>
  {
	var cert = new X509Certificate2(Path.Combine("sts_dev_cert.pfx"), "1234");
	options.ConfigureHttpsDefaults(o =>
	{
		o.ServerCertificate = cert;
		o.ClientCertificateMode = ClientCertificateMode.RequireCertificate;
	});
  })
  .Build();

Implementing the HttpClient

The client of the API uses a HttpClient which was create using an instance of the IHttpClientFactory. This does not provide a way to define a handler for the HttpClient and so we use a HttpRequestMessage to add the Certificate to the “X-ARR-ClientCert” request header. The cert is added as a string using the GetRawCertDataString method.

private async Task<JArray> GetApiDataAsync()
{
	try
	{
		var cert = new X509Certificate2(Path.Combine(_environment.ContentRootPath, "sts_dev_cert.pfx"), "1234");

		var client = _clientFactory.CreateClient();

		var request = new HttpRequestMessage()
		{
			RequestUri = new Uri("https://localhost:44379/api/values"),
			Method = HttpMethod.Get,
		};

		request.Headers.Add("X-ARR-ClientCert", cert.GetRawCertDataString());
		var response = await client.SendAsync(request);

		if (response.IsSuccessStatusCode)
		{
			var responseContent = await response.Content.ReadAsStringAsync();
			var data = JArray.Parse(responseContent);

			return data;
		}

		throw new ApplicationException($"Status code: {response.StatusCode}, Error: {response.ReasonPhrase}");
	}
	catch (Exception e)
	{
		throw new ApplicationException($"Exception {e}");
	}
}

If the correct certificate is sent to the server, the data will be returned. If no certificate is sent, or the wrong certificate, then a 403 will be returned. It would be nice if the IHttpClientFactory would have a way of defining a handler for the HttpClient. I also believe a non valid certificates should fail per default and not require extra validation for this. The AddCertificateForwarding should also not be required to use for a default HTTPClient client calling the service.

Certificate Authentication is great, and helps add another security layer which can be used together with other solutions. See the code and ASP.NET Core src code for further documentation and examples. Links underneath.

Links

https://docs.microsoft.com/en-us/aspnet/core/security/authentication/certauth?view=aspnetcore-3.0

https://github.com/aspnet/AspNetCore/tree/master/src/Security/Authentication/Certificate/src

https://tools.ietf.org/html/rfc5246#section-7.4.4

System Testing ASP.NET Core APIs using XUnit

$
0
0

This article shows how an ASP.NET Core API could be tested using system tests implemented using XUnit. The API is protected using JWT Bearer token authorization, and the API uses a secure token server to validate the API requests. When running the tests, the access token needs to be requested, and used to access the APIs. We can then validate, for example if invalid tokens are rejected.

Code: https://github.com/damienbod/AspNetCoreMvcProtobufFormatters

The demo sofware has two solutions. The target software has an APP which implements the API and a secure token service (STS) which provides and validates the tokens. The second solution is for the system tests. The tests will only work when both the API and the STS are running. We need to run and test the tests locally and well as when the solution is deployed. This means it must be possible to configure different URLs and secrets for the different deployments, so that the tests can be run in each of the different dev, test, production deployments, or whatever system you have.

The API is implemented and secured using the Authorize attribute. Only valid requests with the correct authorization can access this API.

[Authorize]
[Route("api/[controller]")]
public class ValuesController : Controller
{
	// GET api/values/5
	[HttpGet("{id}")]
	public ProtobufModelDto Get(int id)
	{
		return new ProtobufModelDto() { 
		  Id = 1, Name = "HelloWorld", 
		  StringValue = "My first MVC 6 Protobuf service" 
		};
	}

The Startup class ConfigureServices method implements the authentication and authorization settings for the API. The API only accepts access token from the correct STS and tokens which have the apiproto scope, otherwise the request will not be authorized.

public void ConfigureServices(IServiceCollection services)
{
	services.AddAuthentication(IdentityServerAuthenticationDefaults.AuthenticationScheme)
	  .AddIdentityServerAuthentication(options =>
	  {
		  options.Authority = "https://localhost:44318";
		  options.ApiName = "apiproto";
		  options.ApiSecret = "apiprotoSecret";
	  });

	services.AddAuthorization(options =>
	   options.AddPolicy("RequiredScope", policy =>
	   {
		   policy.RequireClaim("scope", "apiproto");
	   })
	);

	...
}

Test Setup

The system tests are setup to read app settings for the different URLs and secrets, so that it can be run against the different deployments.

private readonly HttpClient _client;
private readonly ApiTokenInMemoryClient  _tokenService;
private readonly IConfigurationRoot _configurationRoot;

public ProtobufApiTests()
{
	_configurationRoot = GetIConfigurationRoot();
	//Arrange;
	_client = new HttpClient
	{
		BaseAddress = new System.Uri(_configurationRoot["ApiUrl"])
	};

	_tokenService = 
	  new ApiTokenInMemoryClient(
	    _configurationRoot["StsUrl"], 
		new HttpClient());
}

The access token is requested using the SetTokenAsync method.

private async Task SetTokenAsync(HttpClient client)
{
	var access_token = await _tokenService.GetApiToken(
			"ClientProtectedApi",
			"apiproto",
			_configurationRoot["ApiSecret"]
		);

	client.SetBearerToken(access_token);
}

The token service is used to get an access token for the correct scope, secret and API.

using IdentityModel.Client;
using System;
using System.Collections.Concurrent;
using System.Collections.Generic;
using System.Net.Http;
using System.Threading.Tasks;

namespace AspNetCoreProtobuf.Tests
{
    public class ApiTokenInMemoryClient
    {
        private readonly HttpClient _httpClient;
        private readonly string _stsServerUrl;

        private class AccessTokenItem
        {
            public string AccessToken { get; set; } = string.Empty;
            public DateTime ExpiresIn { get; set; }
        }

        private ConcurrentDictionary<string, AccessTokenItem> _accessTokens = new ConcurrentDictionary<string, AccessTokenItem>();

        public ApiTokenInMemoryClient(
            string stsServerUrl,
            HttpClient httpClient)
        {
            _httpClient = httpClient;
            _stsServerUrl = stsServerUrl;
        }

        public async Task<string> GetApiToken(string api_name, string api_scope, string secret)
        {
            if (_accessTokens.ContainsKey(api_name))
            {
                var accessToken = _accessTokens.GetValueOrDefault(api_name);
                if (accessToken.ExpiresIn > DateTime.UtcNow)
                {
                    return accessToken.AccessToken;
                }
                else
                {
                    // remove
                    _accessTokens.TryRemove(api_name, out AccessTokenItem accessTokenItem);
                }
            }

            var newAccessToken = await getApiToken( api_name,  api_scope,  secret);
            _accessTokens.TryAdd(api_name, newAccessToken);

            return newAccessToken.AccessToken;
        }

        private async Task<AccessTokenItem> getApiToken(string api_name, string api_scope, string secret)
        {
            try
            {
                var disco = await HttpClientDiscoveryExtensions.GetDiscoveryDocumentAsync(
                    _httpClient,
                    _stsServerUrl);

                if (disco.IsError)
                {
                    throw new ApplicationException($"Status code: {disco.IsError}, Error: {disco.Error}");
                }

                var tokenResponse = await HttpClientTokenRequestExtensions.RequestClientCredentialsTokenAsync(_httpClient, new ClientCredentialsTokenRequest
                {
                    Scope = api_scope,
                    ClientSecret = secret,
                    Address = disco.TokenEndpoint,
                    ClientId = api_name
                });

                if (tokenResponse.IsError)
                {
                    throw new ApplicationException($"Status code: {tokenResponse.IsError}, Error: {tokenResponse.Error}");
                }

                return new AccessTokenItem
                {
                    ExpiresIn = DateTime.UtcNow.AddSeconds(tokenResponse.ExpiresIn),
                    AccessToken = tokenResponse.AccessToken
                };
                
            }
            catch (Exception e)
            {
                throw new ApplicationException($"Exception {e}");
            }
        }
    }
}

The Tests

Once the system tests are setup and have an access token, the tests can be run. The following test checks if the basic GET request works with the correct token.

[Fact]
public async Task GetProtobufDataAsString()
{
	await SetTokenAsync(_client);
	// Act
	_client.DefaultRequestHeaders.Accept.Add(new MediaTypeWithQualityHeaderValue("application/x-protobuf"));
	var response = await _client.GetAsync("/api/values/1");
	response.EnsureSuccessStatusCode();

	var responseString = System.Text.Encoding.UTF8.GetString(
		await response.Content.ReadAsByteArrayAsync()
	);

	// Assert
	Assert.Equal("application/x-protobuf", response.Content.Headers.ContentType.MediaType);
	Assert.Equal("\b\u0001\u0012\nHelloWorld\u001a\u001fMy first MVC 6 Protobuf service", responseString);
}

The API can also be tested that a 401 is returned, when no token is sent.

[Fact]
public async Task Get401ForNoToken()
{
	// Act
	_client.DefaultRequestHeaders.Accept.Add(new MediaTypeWithQualityHeaderValue("application/x-protobuf"));
	var response = await _client.GetAsync("/api/values/1");

	// Assert
	Assert.Equal("Unauthorized", response.StatusCode.ToString());
}

The following test uses a valid token, but one which was not created for this API and is rejected. The API must also return a 401.

[Fact]
public async Task Get401ForIncorrectToken()
{
	var access_token = await _tokenService.GetApiToken(
			"ClientProtectedApi",
			"dummy",
			"apiprotoSecret"
		);

	_client.SetBearerToken(access_token);

	// Act
	_client.DefaultRequestHeaders.Accept.Add(new MediaTypeWithQualityHeaderValue("application/x-protobuf"));
	var response = await _client.GetAsync("/api/values/1");

	// Assert
	Assert.Equal("Unauthorized", response.StatusCode.ToString());
}

With this setup, it is really easy to do system tests for you API. These tests are really easy to maintain, as the same technologies are used as the ones the developers use, and so that with each change, the developers have less effort to maintain this.

Links:

https://docs.microsoft.com/en-us/aspnet/core/mvc/controllers/testing?view=aspnetcore-2.2

https://docs.microsoft.com/en-us/aspnet/core/test/integration-tests?view=aspnetcore-2.2

https://xunit.net/

An alternative way to build and bundle Javascript, CSS in ASP.NET Core MVC and Razor Page projects

$
0
0

This article shows how Javascript packages, files, CSS files could be built and bundled in an ASP.NET Core MVC or Razor Page application. The Javascript packages are loaded using npm in which most Javascript projects are deployed. No CDNs are used, only local files so that all external URLs, non self URL links can be completely blocked. This can help in reducing security risks in your application. By using npm, it makes it really simple to update and maintain the UI packages.

Code: https://github.com/damienbod/AspNetCoreInjectConfigurationRazor

Npm is used to manage the frontend packages. To use this, download Node.js and install. Npm will then be ready to use.

The npm package.json contains the packages required for the ASP.NET Core application. For most applications, I use Bootstrap 4. jQuery is used in all of my ASP.NET Core MVC, Razor Page projects as this is probably the most stable Javascript package which exists. This has been stable for a very long time, and is easy to update. I think the cost of updating and maintaining Javascript script packages is underestimated when creating a new technoligy stack. query-validation, jquery-validation-unobtrusive and jquery-ajax-unobtrusive are used for the ASP.NET Core validation and the html attributes which setup the ajax calls, or partial requests.

{
  "version": "1.0.0",
  "name": "asp.net",
  "private": true,
  "devDependencies": {
    "bootstrap": "4.3.1",
    "jquery": "3.4.1",
    "jquery-validation": "1.19.1",
    "jquery-validation-unobtrusive": "3.2.11",
    "jquery-ajax-unobtrusive": "3.2.6",
    "popper.js": "^1.15.0"
  },
  "dependencies": {}
}

The bundleconfig.json file is used to bundle the packages and minify and so on. This file must be configured to match the packages which you use.

// Configure bundling and minification for the project.
// More info at https://go.microsoft.com/fwlink/?LinkId=808241
[
  {
    "outputFileName": "wwwroot/css/site.min.css",
    // An array of relative input file paths. Globbing patterns supported
    "inputFiles": [
      "wwwroot/css/site.css"
    ],
    "minify": { "enabled": true }
  },
  {
    "outputFileName": "wwwroot/js/site.min.js",
    "inputFiles": [
      "wwwroot/js/site.js"
    ],
    // Optionally specify minification options
    "minify": {
      "enabled": true,
      "renameLocals": true
    },
    // Optinally generate .map file
    "sourceMap": false
  },
  // Vendor CSS
  {
    "outputFileName": "wwwroot/css/vendor.min.css",
    "inputFiles": [
      "node_modules/bootstrap/dist/css/bootstrap.min.css"
    ],
    "minify": { "enabled": true }
  },
  // Vendor JS
  {
    "outputFileName": "wwwroot/js/vendor.min.js",
    "inputFiles": [
      "node_modules/jquery/dist/jquery.min.js",
      "node_modules/bootstrap/dist/js/bootstrap.bundle.min.js"
    ],
    "minify": {
      "enabled": true,
      "renameLocals": true
    },
    "sourceMap": false
  },
  // Vendor Validation JS
  {
    "outputFileName": "wwwroot/js/vendor-validation.min.js",
    "inputFiles": [
      "node_modules/jquery-validation/dist/jquery.validate.min.js",
      "node_modules/jquery-validation/dist/additional-methods.min.js",
      "node_modules/jquery-validation-unobtrusive/dist/jquery.validate.unobtrusive.min.js",
      "node_modules/jquery-ajax-unobtrusive/dist/jquery.unobtrusive-ajax.min.js"
    ],
    "minify": {
      "enabled": true,
      "renameLocals": true
    },
    "sourceMap": false
  }
]

The bundles are created and saved to the wwwroot.

The csproj file is setup to use the BuildBundlerMinifier, so that the bundles are created. The npm packages are also downloaded, if the node_modules don’t exist. This project is an ASP.NET Core 3.0 project.

<Project Sdk="Microsoft.NET.Sdk.Web">

  <PropertyGroup>
    <TargetFramework>netcoreapp3.0</TargetFramework>
  </PropertyGroup>


  <ItemGroup>
    <PackageReference Include="BuildBundlerMinifier" Version="2.9.406" />
  </ItemGroup>

  <Target Name="DebugEnsureNodeEnv" BeforeTargets="Build" Condition=" '$(Configuration)' == 'Debug' And !Exists('node_modules') ">
    <!-- Ensure Node.js is installed -->
    <Exec Command="node --version" ContinueOnError="true">
      <Output TaskParameter="ExitCode" PropertyName="ErrorCode" />
    </Exec>
    <Error Condition="'$(ErrorCode)' != '0'" Text="Node.js is required to build and run this project. To continue, please install Node.js from https://nodejs.org/, and then restart your command prompt or IDE." />
    <Message Importance="high" Text="Restoring dependencies using 'npm'. This may take several minutes..." />
    <Exec WorkingDirectory="" Command="npm install" />
  </Target>
  
</Project>

The _Layout.cshtml razor view contains the links to the CSS and the Javscript bundles. Depending on your ASP.NET Core MVC project, Razor Page project, the vendor-validation.min.js file could be moved to a separate view, which is only used for the forms or the ajax views. In this layout no external CDNs are used.

<!DOCTYPE html>
<html>
<head>
    <meta charset="utf-8" />
    <meta name="viewport" content="width=device-width, initial-scale=1.0" />
    <title>@ViewData["Title"] - AspNetCoreInjectConfigurationRazor</title>

    <link rel="stylesheet" href="~/css/vendor.min.css" asp-append-version="true" />
    <link rel="stylesheet" href="~/css/site.min.css" asp-append-version="true" />
    <link rel="stylesheet" href="~/css/fontawesome-free-5.4.1-web/css/all.min.css" asp-append-version="true" />
</head>
<body>

    <div class="container body-content">
        @RenderBody()
    </div>

    <script src="~/js/vendor.min.js" asp-append-version="true"></script>
    <script src="~/js/vendor-validation.min.js" asp-append-version="true"></script>
    <script src="~/js/site.min.js" asp-append-version="true"></script>

    @RenderSection("scripts", required: false)
</body>
</html>

Updating packages

I use npm-check-updates to update my npm packages. Install this as documented in the package docs.

For the command line, ncu -u can be used to update the npm packages. These needs to be executed in the same folder where the packages.json file is.

ncu -u

You can then update the bundleconfig.json to match the updated npm packages. Per default, jQuery and Bootstrap 4 do not change so often, so usually nothing is required here.

After trying many different ways of updating UI packages and CSS in different projects for many different clients, this solution had the least effort to update and maintain the Javascript and CSS.

Links

https://docs.microsoft.com/en-us/aspnet/core/client-side/bundling-and-minification

https://nodejs.org/en/download/

https://www.npmjs.com/package/npm-check-updates

ASP.NET Core Identity with Fido2 WebAuthn MFA

$
0
0

This article shows how Fido2 WebAuthn could be used as 2FA and integrated into an ASP.NET Core Identity application. The Fido2 WebAuthn is implemented using the fido2-net-lib Nuget package, and demo code created by Anders Åberg. The application is implemented using ASP.NET Core 3.0 with Identity. For information about Fido2 and WebAuthn, please refer to the links at the bottom.

Code: https://github.com/damienbod/AspNetCoreIdentityFido2Mfa

Creating the ASP.NET Core Application with Identity

The application was created using the ASP.NET Core 3.0 Razor Page template with Identity (Individual User Accounts).

The following NuGet packages were added. Fido2 is used to implement the Fido2 2FA. Microsoft.AspNetCore.Mvc.NewtonsoftJson is required for the serialization of the Fido requests, responses.

<Project Sdk="Microsoft.NET.Sdk.Web">

  <PropertyGroup>
    <TargetFramework>netcoreapp3.0</TargetFramework>
    <UserSecretsId>aspnet-AspNetCoreIdentityFido2Mfa-590BDC19-E82D-4E23-9F2E-346DA31B5198</UserSecretsId>
  </PropertyGroup>

  <ItemGroup>
    <PackageReference Include="Fido2" Version="1.0.1" />
    <PackageReference Include="Microsoft.AspNetCore.Diagnostics.EntityFrameworkCore" Version="3.0.0-preview7.19365.7" />
    <PackageReference Include="Microsoft.AspNetCore.Identity.EntityFrameworkCore" Version="3.0.0-preview7.19365.7" />
    <PackageReference Include="Microsoft.AspNetCore.Identity.UI" Version="3.0.0-preview7.19365.7" />
    <PackageReference Include="Microsoft.AspNetCore.Mvc.NewtonsoftJson" Version="3.0.0-preview7.19365.7" />
    <PackageReference Include="Microsoft.EntityFrameworkCore.SqlServer" Version="3.0.0-preview7.19362.6" />
    <PackageReference Include="Microsoft.EntityFrameworkCore.Tools" Version="3.0.0-preview7.19362.6" />
    <PackageReference Include="Microsoft.Extensions.Logging.Debug" Version="3.0.0-preview7.19362.4" />
    <PackageReference Include="Microsoft.VisualStudio.Web.CodeGeneration.Design" Version="3.0.0-preview7-19378-04" />
  </ItemGroup>

</Project>

The Identity UI Pages were then scaffolded into the project.

Adding the 2FA using Fido2

Fido2 with the YubiKey 5 Series is used as a 2FA for Identity. For this to work, the user needs to be able to register and activate the Fido2 2FA, then the user can login using the Fido2 2FA and identity. The application also needs a way to deactivate or remove the 2FA.

The demo project from https://github.com/abergs/fido2-net-lib was used to implement the Fido2 logic and also the nuget package. See the docs in the repo.

First the Javascript scripts were added to the wwwroot. mfa.login.js and mfa.register.js plus the 2 required script were added. The scripts were then changed to match the Razor Page templates and the identity requirements.

These scripts depend on other npm packages, CDNs. These were added to the _Layout.cshtml.

<head>
    <meta charset="utf-8" />
    <meta name="viewport" content="width=device-width, initial-scale=1.0" />
    <title>@ViewData["Title"] - AspNetCoreIdentityFido2Mfa</title>
    <link rel="stylesheet" href="~/lib/bootstrap/dist/css/bootstrap.css" />
    <link rel="stylesheet" href="~/css/site.css" />

    <link href="https://fonts.googleapis.com/css?family=Work+Sans" rel="stylesheet">
    <script src="https://cdnjs.cloudflare.com/ajax/libs/popper.js/1.11.0/umd/popper.min.js" integrity="sha384-b/U6ypiBEHpOf/4+1nzFpr53nxSS+GLCkfwBdFNTxtclqqenISfwAzpKaMNFNmj4" crossorigin="anonymous"></script>
    <script type="text/javascript" src="https://cdn.jsdelivr.net/npm/sweetalert2"></script>
    <link rel="stylesheet" href="https://cdnjs.cloudflare.com/ajax/libs/limonte-sweetalert2/6.10.1/sweetalert2.min.css" />
    <script defer src="https://use.fontawesome.com/releases/v5.3.1/js/all.js"></script>

</head>

Register Fido 2FA

A Fido2Mfa Razor Page view was created and added to the Identity/Account/Manage folder. The page uses the logged in user. The page can only be accessed when the user has already logged in. The page is used to activate and register the Fido2 device.

@page "/Fido2Mfa/{handler?}"
@using Microsoft.AspNetCore.Identity
@inject SignInManager<IdentityUser> SignInManager
@inject UserManager<IdentityUser> UserManager
@model AspNetCoreIdentityFido2Mfa.Areas.Identity.Pages.Account.Manage.MfaModel
@{
    Layout = "_Layout.cshtml";
    ViewData["Title"] = "Two-factor authentication (2FA)";
    ViewData["ActivePage"] = ManageNavPages.Fido2Mfa;
}

<h4>@ViewData["Title"]</h4>
<div class="section">
    <div class="container">
        <h1 class="title is-1">2FA/MFA</h1>
        <div class="content"><p>This is scenario where we just want to use FIDO as the MFA. The user register and logins with their username and password. For demo purposes, we trigger the MFA registering on sign up.</p></div>
        <div class="notification is-danger" style="display:none">
            Please note: Your browser does not seem to support WebAuthn yet. <a href="https://caniuse.com/#search=webauthn" target="_blank">Supported browsers</a>
        </div>

        <div class="columns">
            <div class="column is-4">

                <h3 class="title is-3">Add a Fido2 MFA</h3>
                <form action="/Fido2Mfa" method="post" id="register">
                    <div class="field">
                        <label class="label">Username</label>
                        <div class="control has-icons-left has-icons-right">
                            <input class="form-control" type="text" readonly placeholder="email" value="@User.Identity.Name" name="username" required>
                        </div>
                    </div>

                    <div class="field" style="margin-top:10px;">
                        <div class="control">
                            <button class="btn btn-primary">Add Fido2 MFA</button>
                        </div>
                    </div>
                </form>
            </div>
        </div>


    </div>
</div>

<script src="~/js/helpers.js"></script>
<script src="~/js/instant.js"></script>
<script src="~/js/mfa.register.js"></script>

The mfa.register.js uses the RegisterFido2Controller to make the Credential Options and to make the Credential. If successful, 2FA is enabled for the Identity using the Identity UserManager.

using System;
using System.Collections.Generic;
using System.Text;
using System.Threading.Tasks;
using Fido2NetLib.Objects;
using Fido2NetLib;
using Microsoft.AspNetCore.Http;
using Microsoft.AspNetCore.Mvc;
using Microsoft.Extensions.Configuration;
using static Fido2NetLib.Fido2;
using System.IO;
using Microsoft.AspNetCore.Identity;

namespace AspNetCoreIdentityFido2Mfa
{

    [Route("api/[controller]")]
    public class RegisterFido2Controller : Controller
    {
        private Fido2 _lib;
        public static IMetadataService _mds;
        private string _origin;
        private readonly Fido2Storage _fido2Storage;
        private readonly UserManager<IdentityUser> _userManager;

        public RegisterFido2Controller(IConfiguration config, Fido2Storage fido2Storage, UserManager<IdentityUser> userManager)
        {
            _userManager = userManager;
            _fido2Storage = fido2Storage;
            var MDSAccessKey = config["fido2:MDSAccessKey"];
            var MDSCacheDirPath = config["fido2:MDSCacheDirPath"] ?? Path.Combine(Path.GetTempPath(), "fido2mdscache"); 
            _mds = string.IsNullOrEmpty(MDSAccessKey) ? null : MDSMetadata.Instance(MDSAccessKey, MDSCacheDirPath);
            if (null != _mds)
            {
                if (false == _mds.IsInitialized())
                    _mds.Initialize().Wait();
            }
            _origin = config["fido2:origin"];
            if(_origin == null)
            {
                _origin = "https://localhost:44388";
            }

            var domain = config["fido2:serverDomain"];
            if (domain == null)
            {
                domain = "localhost";
            }

            _lib = new Fido2(new Fido2Configuration()
            {
                ServerDomain = domain,
                ServerName = "Fido2IdentityMfa",
                Origin = _origin,
                // Only create and use Metadataservice if we have an acesskey
                MetadataService = _mds,
                TimestampDriftTolerance = config.GetValue<int>("fido2:TimestampDriftTolerance")
            });
        }

        private string FormatException(Exception e)
        {
            return string.Format("{0}{1}", e.Message, e.InnerException != null ? " (" + e.InnerException.Message + ")" : "");
        }

        [HttpPost]
        [Route("/makeCredentialOptions")]
        public async Task<JsonResult> MakeCredentialOptions([FromForm] string username, [FromForm] string displayName, [FromForm] string attType, [FromForm] string authType, [FromForm] bool requireResidentKey, [FromForm] string userVerification)
        {
            try
            {
                if (string.IsNullOrEmpty(username))
                {
                    username = $"{displayName} (Usernameless user created at {DateTime.UtcNow})";
                }

                var identityUser = await _userManager.FindByEmailAsync(username);
                var user = new Fido2User
                {
                    DisplayName = identityUser.UserName,
                    Name = identityUser.UserName,
                    Id = Encoding.UTF8.GetBytes(identityUser.UserName) // byte representation of userID is required
                };

                // 2. Get user existing keys by username
                var items = await _fido2Storage.GetCredentialsByUsername(identityUser.UserName);
                var existingKeys = new List<PublicKeyCredentialDescriptor>();
                foreach(var publicKeyCredentialDescriptor in items)
                {
                    existingKeys.Add(publicKeyCredentialDescriptor.Descriptor);
                }

                // 3. Create options
                var authenticatorSelection = new AuthenticatorSelection
                {
                    RequireResidentKey = requireResidentKey,
                    UserVerification = userVerification.ToEnum<UserVerificationRequirement>()
                };

                if (!string.IsNullOrEmpty(authType))
                    authenticatorSelection.AuthenticatorAttachment = authType.ToEnum<AuthenticatorAttachment>();

                var exts = new AuthenticationExtensionsClientInputs() { Extensions = true, UserVerificationIndex = true, Location = true, UserVerificationMethod = true, BiometricAuthenticatorPerformanceBounds = new AuthenticatorBiometricPerfBounds { FAR = float.MaxValue, FRR = float.MaxValue } };

                var options = _lib.RequestNewCredential(user, existingKeys, authenticatorSelection, attType.ToEnum<AttestationConveyancePreference>(), exts);

                // 4. Temporarily store options, session/in-memory cache/redis/db
                HttpContext.Session.SetString("fido2.attestationOptions", options.ToJson());

                // 5. return options to client
                return Json(options);
            }
            catch (Exception e)
            {
                return Json(new CredentialCreateOptions { Status = "error", ErrorMessage = FormatException(e) });
            }
        }

        [HttpPost]
        [Route("/makeCredential")]
        public async Task<JsonResult> MakeCredential([FromBody] AuthenticatorAttestationRawResponse attestationResponse)
        {
            try
            {
                // 1. get the options we sent the client
                var jsonOptions = HttpContext.Session.GetString("fido2.attestationOptions");
                var options = CredentialCreateOptions.FromJson(jsonOptions);

                // 2. Create callback so that lib can verify credential id is unique to this user
                IsCredentialIdUniqueToUserAsyncDelegate callback = async (IsCredentialIdUniqueToUserParams args) =>
                {
                    var users = await _fido2Storage.GetUsersByCredentialIdAsync(args.CredentialId);
                    if (users.Count > 0) return false;

                    return true;
                };

                // 2. Verify and make the credentials
                var success = await _lib.MakeNewCredentialAsync(attestationResponse, options, callback);

                // 3. Store the credentials in db
                await _fido2Storage.AddCredentialToUser(options.User, new FidoStoredCredential
                {
                    Username = options.User.Name,
                    Descriptor = new PublicKeyCredentialDescriptor(success.Result.CredentialId),
                    PublicKey = success.Result.PublicKey,
                    UserHandle = success.Result.User.Id,
                    SignatureCounter = success.Result.Counter,
                    CredType = success.Result.CredType,
                    RegDate = DateTime.Now,
                    AaGuid = success.Result.Aaguid
                });

                // 4. return "ok" to the client

                var user = await _userManager.GetUserAsync(User);
                if (user == null)
                {
                    return Json(new CredentialMakeResult { Status = "error", ErrorMessage = $"Unable to load user with ID '{_userManager.GetUserId(User)}'." });
                }

                await _userManager.SetTwoFactorEnabledAsync(user, true);
                var userId = await _userManager.GetUserIdAsync(user);

                return Json(success);
            }
            catch (Exception e)
            {
                return Json(new CredentialMakeResult { Status = "error", ErrorMessage = FormatException(e) });
            }
        }
    }
}

The RegisterFido2Controller class uses the FidoStoredCredential entity and the Fido2Storage to persist the Fido2 data to the SQL database using Entity Framework Core. The PublicKeyCredentialDescriptor property is persisted as a Json string.

public class FidoStoredCredential
{
	public string Username { get; set; }
	public byte[] UserId { get; set; }
	public byte[] PublicKey { get; set; }
	public byte[] UserHandle { get; set; }
	public uint SignatureCounter { get; set; }
	public string CredType { get; set; }
	public DateTime RegDate { get; set; }
	public Guid AaGuid { get; set; }

	[NotMapped]
	public PublicKeyCredentialDescriptor Descriptor
	{
		get { return string.IsNullOrWhiteSpace(DescriptorJson) ? null : JsonConvert.DeserializeObject<PublicKeyCredentialDescriptor>(DescriptorJson); }
		set { DescriptorJson = JsonConvert.SerializeObject(value); }
	}
	public string DescriptorJson { get; set; }
}

Teh entity is added to the ApplicationDbContext. The Username which is the unique email, is used as a key.

using Microsoft.AspNetCore.Identity.EntityFrameworkCore;
using Microsoft.EntityFrameworkCore;

namespace AspNetCoreIdentityFido2Mfa.Data
{
    public class ApplicationDbContext : IdentityDbContext
    {
        public ApplicationDbContext(DbContextOptions<ApplicationDbContext> options)
            : base(options)
        {
        }

        public DbSet<FidoStoredCredential> FidoStoredCredential { get; set; }

        protected override void OnModelCreating(ModelBuilder builder)
        {
            builder.Entity<FidoStoredCredential>().HasKey(m => m.Username);

            base.OnModelCreating(builder);
        }
    }
}

The FidoStoredCredential class can now be used to interact with the database.

using AspNetCoreIdentityFido2Mfa.Data;
using Fido2NetLib;
using Microsoft.EntityFrameworkCore;
using System;
using System.Collections.Generic;
using System.Linq;
using System.Text;
using System.Threading.Tasks;

namespace AspNetCoreIdentityFido2Mfa
{
    public class Fido2Storage
    {
       private readonly ApplicationDbContext _applicationDbContext;

        public Fido2Storage(ApplicationDbContext applicationDbContext)
        {
            _applicationDbContext = applicationDbContext;
        }

        public async Task<List<FidoStoredCredential>> GetCredentialsByUsername(string username)
        {
            return await _applicationDbContext.FidoStoredCredential.Where(c => c.Username == username).ToListAsync();
        }

        public async Task RemoveCredentialsByUsername(string username)
        {
            var item = await _applicationDbContext.FidoStoredCredential.Where(c => c.Username == username).FirstOrDefaultAsync();
            if(item != null)
            {
                _applicationDbContext.FidoStoredCredential.Remove(item);
                await _applicationDbContext.SaveChangesAsync();
            }
        }

        public async Task<FidoStoredCredential> GetCredentialById(byte[] id)
        {
            var credentialIdString = Base64Url.Encode(id);
            //byte[] credentialIdStringByte = Base64Url.Decode(credentialIdString);

            var cred = await _applicationDbContext.FidoStoredCredential
                .Where(c => c.DescriptorJson.Contains(credentialIdString)).FirstOrDefaultAsync();

            return cred;
        }

        public Task<List<FidoStoredCredential>> GetCredentialsByUserHandleAsync(byte[] userHandle)
        {
            return Task.FromResult(_applicationDbContext.FidoStoredCredential.Where(c => c.UserHandle.SequenceEqual(userHandle)).ToList());
        }

        public async Task UpdateCounter(byte[] credentialId, uint counter)
        {
            var credentialIdString = Base64Url.Encode(credentialId);
            //byte[] credentialIdStringByte = Base64Url.Decode(credentialIdString);

            var cred = await _applicationDbContext.FidoStoredCredential
                .Where(c => c.DescriptorJson.Contains(credentialIdString)).FirstOrDefaultAsync();

            cred.SignatureCounter = counter;
            await _applicationDbContext.SaveChangesAsync();
        }

        public async Task AddCredentialToUser(Fido2User user, FidoStoredCredential credential)
        {
            credential.UserId = user.Id;
            _applicationDbContext.FidoStoredCredential.Add(credential);
            await _applicationDbContext.SaveChangesAsync();
        }

        public async Task<List<Fido2User>> GetUsersByCredentialIdAsync(byte[] credentialId)
        {
            var credentialIdString = Base64Url.Encode(credentialId);
            //byte[] credentialIdStringByte = Base64Url.Decode(credentialIdString);

            var cred = await _applicationDbContext.FidoStoredCredential
                .Where(c => c.DescriptorJson.Contains(credentialIdString)).FirstOrDefaultAsync();

            if (cred == null)
            {
                return new List<Fido2User>();
            }

            return await _applicationDbContext.Users
                    .Where(u => Encoding.UTF8.GetBytes(u.UserName)
                    .SequenceEqual(cred.UserId))
                    .Select(u => new Fido2User
                    {
                        DisplayName = u.UserName,
                        Name = u.UserName,
                        Id = Encoding.UTF8.GetBytes(u.UserName) // byte representation of userID is required
                    }).ToListAsync();
        }
    }
}

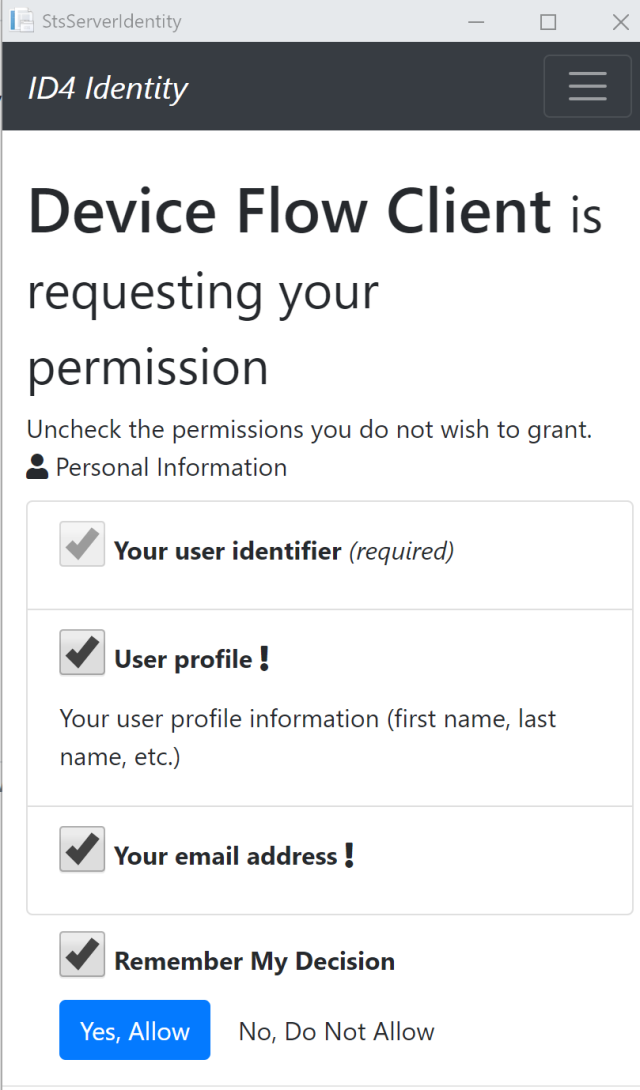
Now the user can register and activate a Fido2 2FA with Identity. Start the application and login. Click your email, and then Two-Factor authentication.

Click Add Fido2 MFA

Click Add Fido2 MFA. Now you can use your hardware key to complete the request.

Login with Fido2

The next step is to implement the login with Fido2 2FA. A code if statement to use the Fido 2FA is added to the Account login page. The Fido2Storage instance is added and this is user to check if a Fido2 registration exists for this user. If so, after a successful login, the user is redirected to the second step at the LoginFido2Mfa Razor Page.

using System;
using System.Collections.Generic;
using System.ComponentModel.DataAnnotations;
using System.Linq;
using System.Text.Encodings.Web;
using System.Threading.Tasks;
using Microsoft.AspNetCore.Authorization;
using Microsoft.AspNetCore.Authentication;
using Microsoft.AspNetCore.Identity;
using Microsoft.AspNetCore.Identity.UI.Services;
using Microsoft.AspNetCore.Mvc;
using Microsoft.AspNetCore.Mvc.RazorPages;
using Microsoft.Extensions.Logging;

namespace AspNetCoreIdentityFido2Mfa.Areas.Identity.Pages.Account
{
    [AllowAnonymous]
    public class LoginModel : PageModel
    {
        private readonly UserManager<IdentityUser> _userManager;
        private readonly SignInManager<IdentityUser> _signInManager;
        private readonly ILogger<LoginModel> _logger;
        private readonly IEmailSender _emailSender;
        private readonly Fido2Storage _fido2Storage;

        public LoginModel(SignInManager<IdentityUser> signInManager, 
            ILogger<LoginModel> logger,
            UserManager<IdentityUser> userManager,
            IEmailSender emailSender,
            Fido2Storage fido2Storage)
        {
            _fido2Storage = fido2Storage;
            _userManager = userManager;
            _signInManager = signInManager;
            _emailSender = emailSender;
            _logger = logger;
        }

        public async Task<IActionResult> OnPostAsync(string returnUrl = null)
        {
            returnUrl = returnUrl ?? Url.Content("~/");

            if (ModelState.IsValid)
            {
                // This doesn't count login failures towards account lockout
                // To enable password failures to trigger account lockout, set lockoutOnFailure: true
                var result = await _signInManager.PasswordSignInAsync(Input.Email, Input.Password, Input.RememberMe, lockoutOnFailure: true);
                if (result.Succeeded)
                {
                    _logger.LogInformation("User logged in.");
                    return LocalRedirect(returnUrl);
                }
                if (result.RequiresTwoFactor)
                {
                    var fido2ItemExistsForUser = await _fido2Storage.GetCredentialsByUsername(Input.Email);
                    if (fido2ItemExistsForUser.Count > 0)
                    {
                        return RedirectToPage("./LoginFido2Mfa", new { ReturnUrl = returnUrl, RememberMe = Input.RememberMe });
                    }
                    else
                    {
                        return RedirectToPage("./LoginWith2fa", new { ReturnUrl = returnUrl, RememberMe = Input.RememberMe });
                    }
                }
                
                if (result.IsLockedOut)
                {
                    _logger.LogWarning("User account locked out.");
                    return RedirectToPage("./Lockout");
                }
                else
                {
                    ModelState.AddModelError(string.Empty, "Invalid login attempt.");
                    return Page();
                }
            }

            // If we got this far, something failed, redisplay form
            return Page();
        }
    }
}

The LoginFido2Mfa Razor Page uses the mfa.login.js to implement the Fido2 logic.

@page 
@using Microsoft.AspNetCore.Identity
@inject SignInManager<IdentityUser> SignInManager
@inject UserManager<IdentityUser> UserManager
@model AspNetCoreIdentityFido2Mfa.Areas.Identity.Pages.Account.MfaModel
@{
    ViewData["Title"] = "Login with Fido2 MFA";
}

<h4>@ViewData["Title"]</h4>
<div class="section">
    <div class="container">
        <h1 class="title is-1">2FA/MFA</h1>
        <div class="content"><p>This is scenario where we just want to use FIDO as the MFA. The user register and logins with their username and password. For demo purposes, we trigger the MFA registering on sign up.</p></div>
        <div class="notification is-danger" style="display:none">
            Please note: Your browser does not seem to support WebAuthn yet. <a href="https://caniuse.com/#search=webauthn" target="_blank">Supported browsers</a>
        </div>

        <div class="columns">
            <div class="column is-4">

                <h3 class="title is-3">Fido2 2FA</h3>
                <form action="/LoginFido2Mfa" method="post" id="signin">

                    <div class="field">
                        <div class="control">
                            <button class="btn btn-primary">2FA with Fido2 device</button>
                        </div>
                    </div>
                </form>
            </div>
        </div>

    </div>
</div>

<script src="~/js/helpers.js"></script>
<script src="~/js/instant.js"></script>
<script src="~/js/mfa.login.js"></script>

The mfa.login.js script uses the SignInFidoController to complete the login. This controller has two methods, AssertionOptionsPost and MakeAssertion.

using System;
using System.Collections.Generic;
using System.Linq;
using System.Text;
using System.Threading.Tasks;
using Fido2NetLib.Objects;
using Fido2NetLib;
using Microsoft.AspNetCore.Http;
using Microsoft.AspNetCore.Mvc;
using Microsoft.Extensions.Configuration;
using static Fido2NetLib.Fido2;
using System.IO;
using Microsoft.AspNetCore.Identity;

namespace AspNetCoreIdentityFido2Mfa
{

    [Route("api/[controller]")]
    public class SignInFidoController : Controller
    {
        private Fido2 _lib;
        public static IMetadataService _mds;
        private string _origin;
        private readonly Fido2Storage _fido2Storage;
        private readonly UserManager<IdentityUser> _userManager;
        private readonly SignInManager<IdentityUser> _signInManager;

        public SignInFidoController(IConfiguration config,
            Fido2Storage fido2Storage,
            UserManager<IdentityUser> userManager,
            SignInManager<IdentityUser> signInManager)
        {
            _signInManager = signInManager;
            _userManager = userManager;
            _fido2Storage = fido2Storage;
            var MDSAccessKey = config["fido2:MDSAccessKey"];
            var MDSCacheDirPath = config["fido2:MDSCacheDirPath"] ?? Path.Combine(Path.GetTempPath(), "fido2mdscache");
            _mds = string.IsNullOrEmpty(MDSAccessKey) ? null : MDSMetadata.Instance(MDSAccessKey, MDSCacheDirPath);
            if (null != _mds)
            {
                if (false == _mds.IsInitialized())
                    _mds.Initialize().Wait();
            }
            _origin = config["fido2:origin"];
            _lib = new Fido2(new Fido2Configuration()
            {
                ServerDomain = config["fido2:serverDomain"],
                ServerName = "Fido2 test",
                Origin = _origin,
                // Only create and use Metadataservice if we have an acesskey
                MetadataService = _mds,
                TimestampDriftTolerance = config.GetValue<int>("fido2:TimestampDriftTolerance")
            });
        }

        private string FormatException(Exception e)
        {
            return string.Format("{0}{1}", e.Message, e.InnerException != null ? " (" + e.InnerException.Message + ")" : "");
        }

        [HttpPost]
        [Route("/assertionOptions")]
        public async Task<ActionResult> AssertionOptionsPost([FromForm] string username, [FromForm] string userVerification)
        {
            try
            {
                var identityUser = await _signInManager.GetTwoFactorAuthenticationUserAsync();
                if (identityUser == null)
                {
                    throw new InvalidOperationException($"Unable to load two-factor authentication user.");
                }

                var existingCredentials = new List<PublicKeyCredentialDescriptor>();

                if (!string.IsNullOrEmpty(identityUser.UserName))
                {
                    
                    var user = new Fido2User
                    {
                        DisplayName = identityUser.UserName,
                        Name = identityUser.UserName,
                        Id = Encoding.UTF8.GetBytes(identityUser.UserName) // byte representation of userID is required
                    };

                    if (user == null) throw new ArgumentException("Username was not registered");

                    // 2. Get registered credentials from database
                    var items = await _fido2Storage.GetCredentialsByUsername(identityUser.UserName);
                    existingCredentials = items.Select(c => c.Descriptor).ToList();
                }

                var exts = new AuthenticationExtensionsClientInputs() { SimpleTransactionAuthorization = "FIDO", GenericTransactionAuthorization = new TxAuthGenericArg { ContentType = "text/plain", Content = new byte[] { 0x46, 0x49, 0x44, 0x4F } }, UserVerificationIndex = true, Location = true, UserVerificationMethod = true };

                // 3. Create options
                var uv = string.IsNullOrEmpty(userVerification) ? UserVerificationRequirement.Discouraged : userVerification.ToEnum<UserVerificationRequirement>();
                var options = _lib.GetAssertionOptions(
                    existingCredentials,
                    uv,
                    exts
                );

                // 4. Temporarily store options, session/in-memory cache/redis/db
                HttpContext.Session.SetString("fido2.assertionOptions", options.ToJson());

                // 5. Return options to client
                return Json(options);
            }

            catch (Exception e)
            {
                return Json(new AssertionOptions { Status = "error", ErrorMessage = FormatException(e) });
            }
        }

        [HttpPost]
        [Route("/makeAssertion")]
        public async Task<JsonResult> MakeAssertion([FromBody] AuthenticatorAssertionRawResponse clientResponse)
        {
            try
            {
                // 1. Get the assertion options we sent the client
                var jsonOptions = HttpContext.Session.GetString("fido2.assertionOptions");
                var options = AssertionOptions.FromJson(jsonOptions);

                // 2. Get registered credential from database
                var creds = await _fido2Storage.GetCredentialById(clientResponse.Id);

                if (creds == null)
                {
                    throw new Exception("Unknown credentials");
                }

                // 3. Get credential counter from database
                var storedCounter = creds.SignatureCounter;

                // 4. Create callback to check if userhandle owns the credentialId
                IsUserHandleOwnerOfCredentialIdAsync callback = async (args) =>
                {
                    var storedCreds = await _fido2Storage.GetCredentialsByUserHandleAsync(args.UserHandle);
                    return storedCreds.Exists(c => c.Descriptor.Id.SequenceEqual(args.CredentialId));
                };

                // 5. Make the assertion
                var res = await _lib.MakeAssertionAsync(clientResponse, options, creds.PublicKey, storedCounter, callback);

                // 6. Store the updated counter
                await _fido2Storage.UpdateCounter(res.CredentialId, res.Counter);

                // complete sign-in
                var user = await _signInManager.GetTwoFactorAuthenticationUserAsync();
                if (user == null)
                {
                    throw new InvalidOperationException($"Unable to load two-factor authentication user.");
                }
                
                var result = await _signInManager.TwoFactorSignInAsync("FIDO2", string.Empty, false, false);

                // 7. return OK to client
                return Json(res);
            }
            catch (Exception e)
            {
                return Json(new AssertionVerificationResult { Status = "error", ErrorMessage = FormatException(e) });
            }
        }
    }
}

If the Fido2 login is successful, the signInManager.TwoFactorSignInAsync method is used to complete the 2FA in Identity.

This requires an implementation of the IUserTwoFactorTokenProvider to complete the login. The Fifo2UserTwoFactorTokenProvider implements the IUserTwoFactorTokenProvider interface and just returns true.

using Microsoft.AspNetCore.Identity;
using System;
using System.Collections.Generic;
using System.Linq;
using System.Threading.Tasks;

namespace AspNetCoreIdentityFido2Mfa
{
    public class Fifo2UserTwoFactorTokenProvider : IUserTwoFactorTokenProvider<IdentityUser>
    {
        public Task<bool> CanGenerateTwoFactorTokenAsync(UserManager<IdentityUser> manager, IdentityUser user)
        {
            return Task.FromResult(true);
        }

        public Task<string> GenerateAsync(string purpose, UserManager<IdentityUser> manager, IdentityUser user)
        {
            return Task.FromResult("fido2");
        }

        public Task<bool> ValidateAsync(string purpose, string token, UserManager<IdentityUser> manager, IdentityUser user)
        {
            return Task.FromResult(true);
        }
    }
}

For all of this to work, the services and everything needs to be configured in the startup class. The AddControllers method is used to add the services for the Fido2 controllers as well as the extension method AddNewtonsoftJson(). The AddTokenProvider method is used to add the Fido2 2FA provider. Fido2Storage is added as a scoped service.

using System;
using System.Collections.Generic;
using System.Linq;
using System.Threading.Tasks;
using Microsoft.AspNetCore.Builder;
using Microsoft.AspNetCore.Identity;
using Microsoft.AspNetCore.Identity.UI;
using Microsoft.AspNetCore.Hosting;
using Microsoft.AspNetCore.HttpsPolicy;
using Microsoft.EntityFrameworkCore;
using AspNetCoreIdentityFido2Mfa.Data;
using Microsoft.Extensions.Configuration;
using Microsoft.Extensions.DependencyInjection;
using Microsoft.Extensions.Hosting;

namespace AspNetCoreIdentityFido2Mfa
{
    public class Startup
    {
        public Startup(IConfiguration configuration)
        {
            Configuration = configuration;
        }

        public IConfiguration Configuration { get; }

        // This method gets called by the runtime. Use this method to add services to the container.
        public void ConfigureServices(IServiceCollection services)
        {

            services.AddDbContext<ApplicationDbContext>(options =>
                options.UseSqlServer(
                    Configuration.GetConnectionString("DefaultConnection")));
            services.AddDefaultIdentity<IdentityUser>(options => options.SignIn.RequireConfirmedAccount = true)
                .AddEntityFrameworkStores<ApplicationDbContext>()
                .AddTokenProvider<Fifo2UserTwoFactorTokenProvider>("FIDO2");


            services.AddControllers()
               .AddNewtonsoftJson();

            services.AddRazorPages();

            services.AddScoped<Fido2Storage>();
            // Adds a default in-memory implementation of IDistributedCache.
            services.AddDistributedMemoryCache();
            services.AddSession(options =>
            {
                // Set a short timeout for easy testing.
                options.IdleTimeout = TimeSpan.FromMinutes(2);
                options.Cookie.HttpOnly = true;
                options.Cookie.SameSite = Microsoft.AspNetCore.Http.SameSiteMode.None;
            });

        }

        // This method gets called by the runtime. Use this method to configure the HTTP request pipeline.
        public void Configure(IApplicationBuilder app, IWebHostEnvironment env)
        {
            if (env.IsDevelopment())
            {
                app.UseDeveloperExceptionPage();
                app.UseDatabaseErrorPage();
            }
            else
            {
                app.UseExceptionHandler("/Error");
                // The default HSTS value is 30 days. You may want to change this for production scenarios, see https://aka.ms/aspnetcore-hsts.
                app.UseHsts();
            }

            app.UseHttpsRedirection();
            app.UseStaticFiles();

            app.UseRouting();

            app.UseAuthentication();
            app.UseAuthorization();

            app.UseSession();

            app.UseEndpoints(endpoints =>
            {
                endpoints.MapRazorPages();
                endpoints.MapControllers();
            });
        }
    }
}

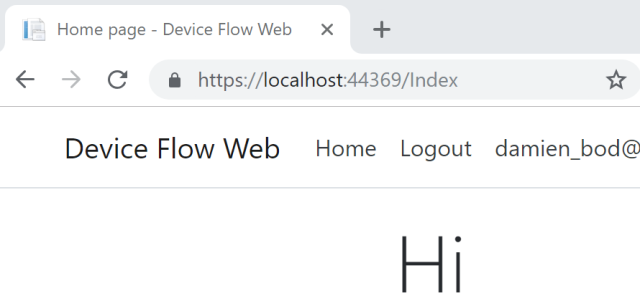
Now that your user is registered, you can click the login button:

Then the user will be asked to do a second factor auth using the Fido2 device.

And you can complete the login using the hardware device.

Disable Fido2 2FA

The identity Disable Razor Page is extended to remove the Fido data for this user.

using System;
using System.Collections.Generic;
using System.Linq;
using System.Threading.Tasks;
using Microsoft.AspNetCore.Identity;
using Microsoft.AspNetCore.Mvc;
using Microsoft.AspNetCore.Mvc.RazorPages;
using Microsoft.Extensions.Logging;

namespace AspNetCoreIdentityFido2Mfa.Areas.Identity.Pages.Account.Manage
{
    public class Disable2faModel : PageModel
    {
        private readonly UserManager<IdentityUser> _userManager;
        private readonly Fido2Storage _fido2Storage;
        private readonly ILogger<Disable2faModel> _logger;

        public Disable2faModel(
            UserManager<IdentityUser> userManager,
            ILogger<Disable2faModel> logger,
            Fido2Storage fido2Storage)
        {
            _userManager = userManager;
            _fido2Storage = fido2Storage;
            _logger = logger;
        }

        [TempData]
        public string StatusMessage { get; set; }

        public async Task<IActionResult> OnGet()
        {
            var user = await _userManager.GetUserAsync(User);
            if (user == null)
            {
                return NotFound($"Unable to load user with ID '{_userManager.GetUserId(User)}'.");
            }

            if (!await _userManager.GetTwoFactorEnabledAsync(user))
            {
                throw new InvalidOperationException($"Cannot disable 2FA for user with ID '{_userManager.GetUserId(User)}' as it's not currently enabled.");
            }

            return Page();
        }

        public async Task<IActionResult> OnPostAsync()
        {
            var user = await _userManager.GetUserAsync(User);
            if (user == null)
            {
                return NotFound($"Unable to load user with ID '{_userManager.GetUserId(User)}'.");
            }

            // remove Fido2 MFA if it exists
            await _fido2Storage.RemoveCredentialsByUsername(user.UserName);

            var disable2faResult = await _userManager.SetTwoFactorEnabledAsync(user, false);
            if (!disable2faResult.Succeeded)
            {
                throw new InvalidOperationException($"Unexpected error occurred disabling 2FA for user with ID '{_userManager.GetUserId(User)}'.");
            }

            _logger.LogInformation("User with ID '{UserId}' has disabled 2fa.", _userManager.GetUserId(User));
            StatusMessage = "2fa has been disabled. You can reenable 2fa when you setup an authenticator app";
            return RedirectToPage("./TwoFactorAuthentication");
        }
    }
}

Add the recovery codes for the Fido2 2FA

The demo code is not complete, the user should be redirected to the generated recovery codes, so if he/she loses the Fido2 hardware device, the account can be recovered.

Hardware

This code and application was tested using YubiKey 5 Series. This works really good, and is only about 50$ to buy. Many online services already support this, and I would recommend this device.

Links:

https://github.com/abergs/fido2-net-lib

The YubiKey

https://www.troyhunt.com/beyond-passwords-2fa-u2f-and-google-advanced-protection/

FIDO2: WebAuthn & CTAP

https://www.w3.org/TR/webauthn/

https://www.scottbrady91.com/FIDO/A-FIDO2-Primer-and-Proof-of-Concept-using-ASPNET-Core

https://github.com/herrjemand/awesome-webauthn

https://developers.yubico.com/FIDO2/Libraries/Using_a_library.html

View at Medium.com

https://docs.microsoft.com/en-us/aspnet/core/?view=aspnetcore-3.0

https://www.nuget.org/packages/Fido2/

Viewing all 96 articles
Browse latest View live


<script src="https://jsc.adskeeper.com/r/s/rssing.com.1596347.js" async> </script>